This is exactly the best and the proper APN settings for SFR. Anyone using an Android or iOS device must use these APN settings. We have also included all the necessary screenshots showing how you can configure the internet settings for mobile data on SFR France. So without wasting any more seconds, let’s get started.
SFR APN Details

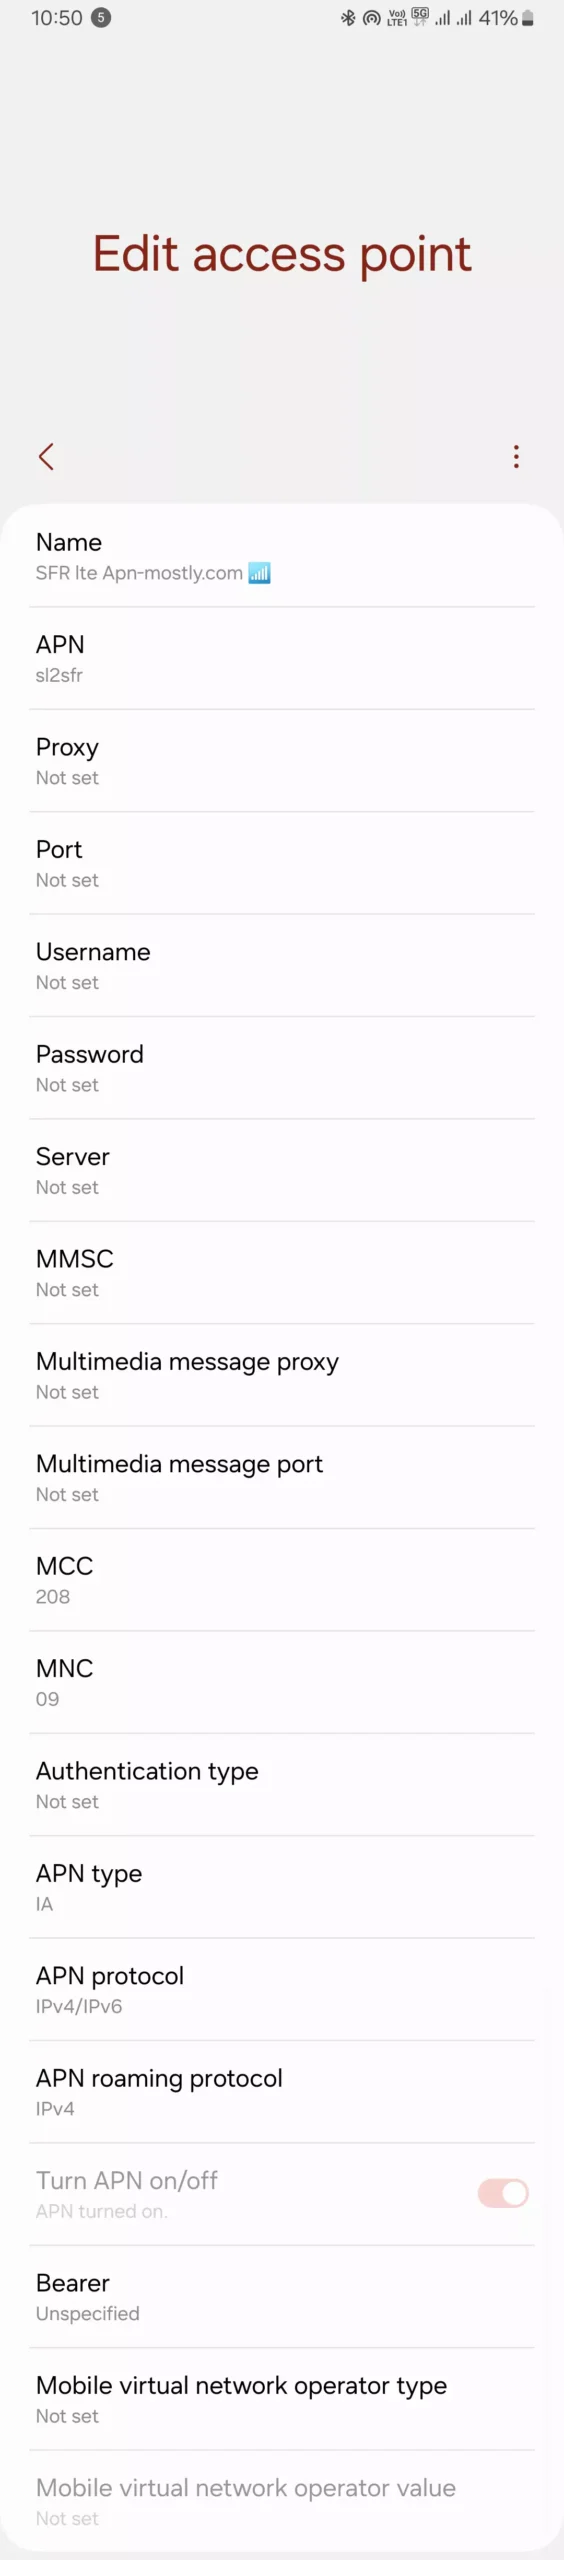
SFR LTE APN Settings
| Field | Value |
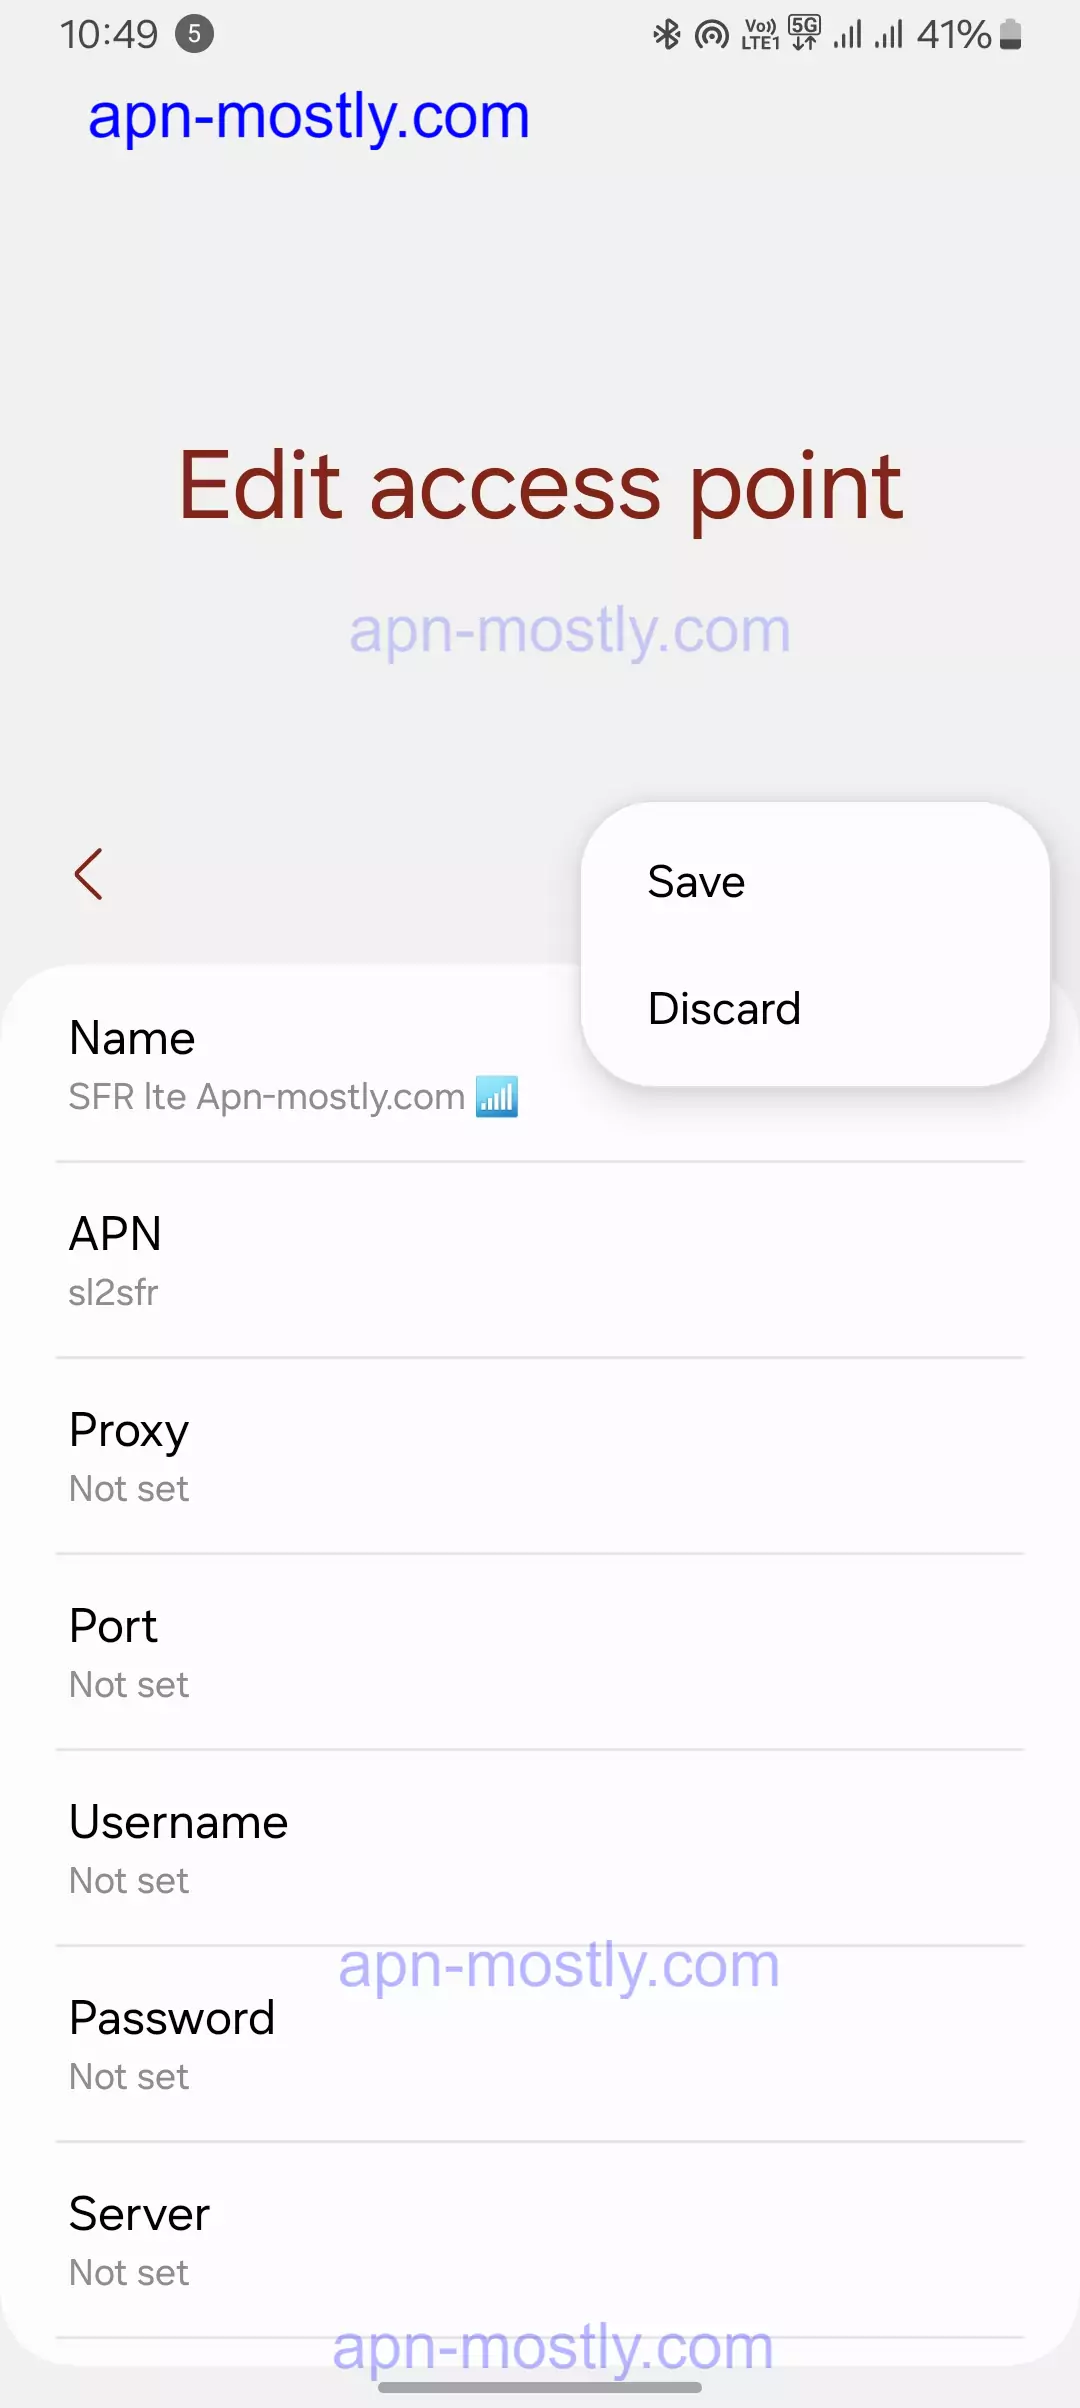
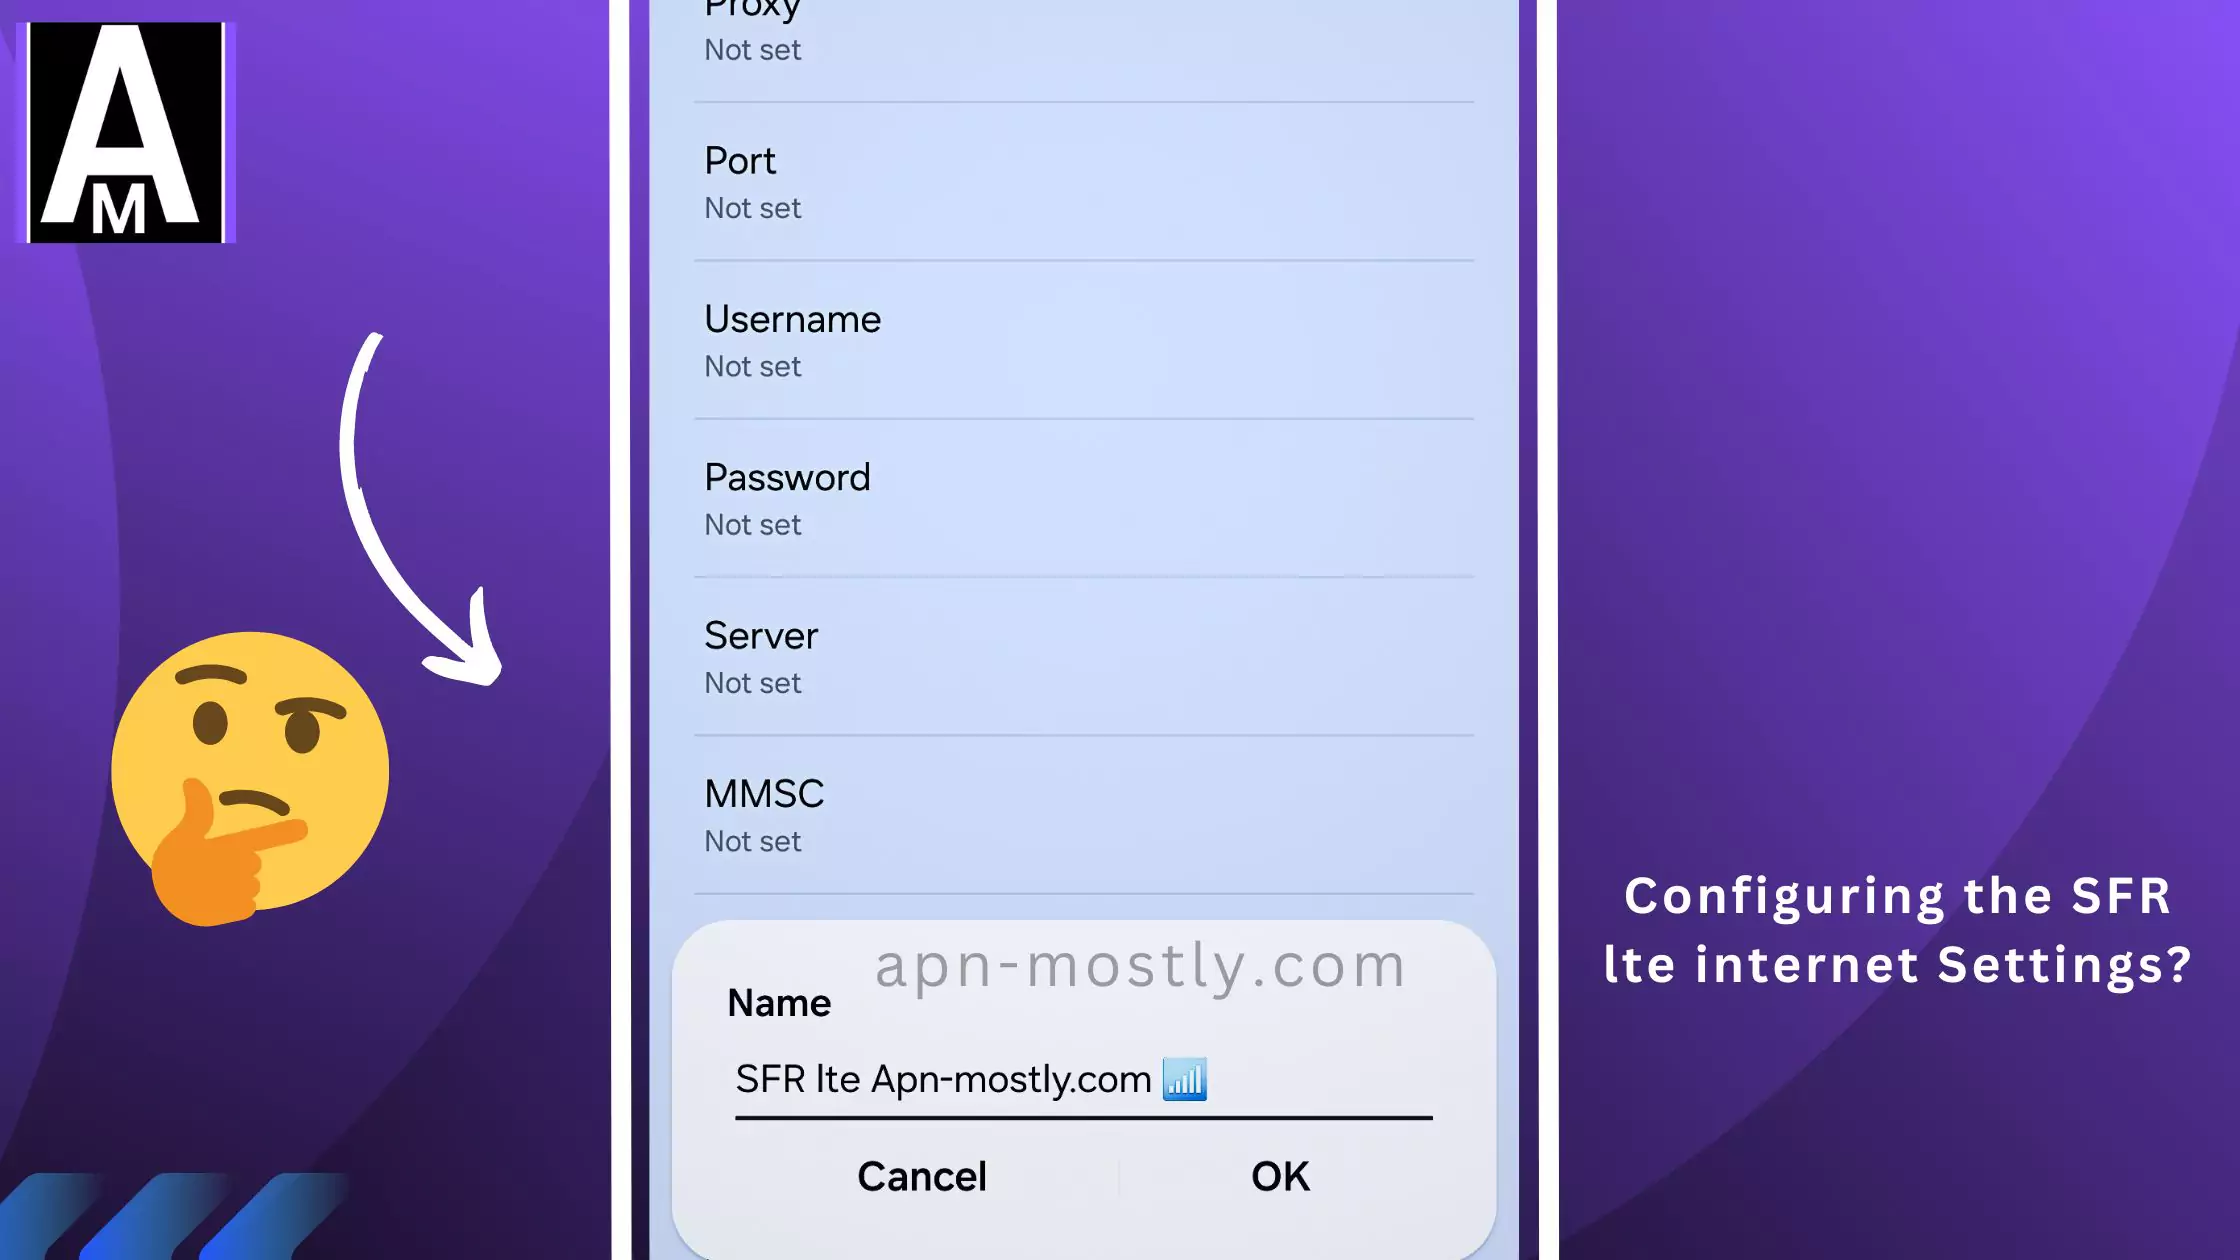
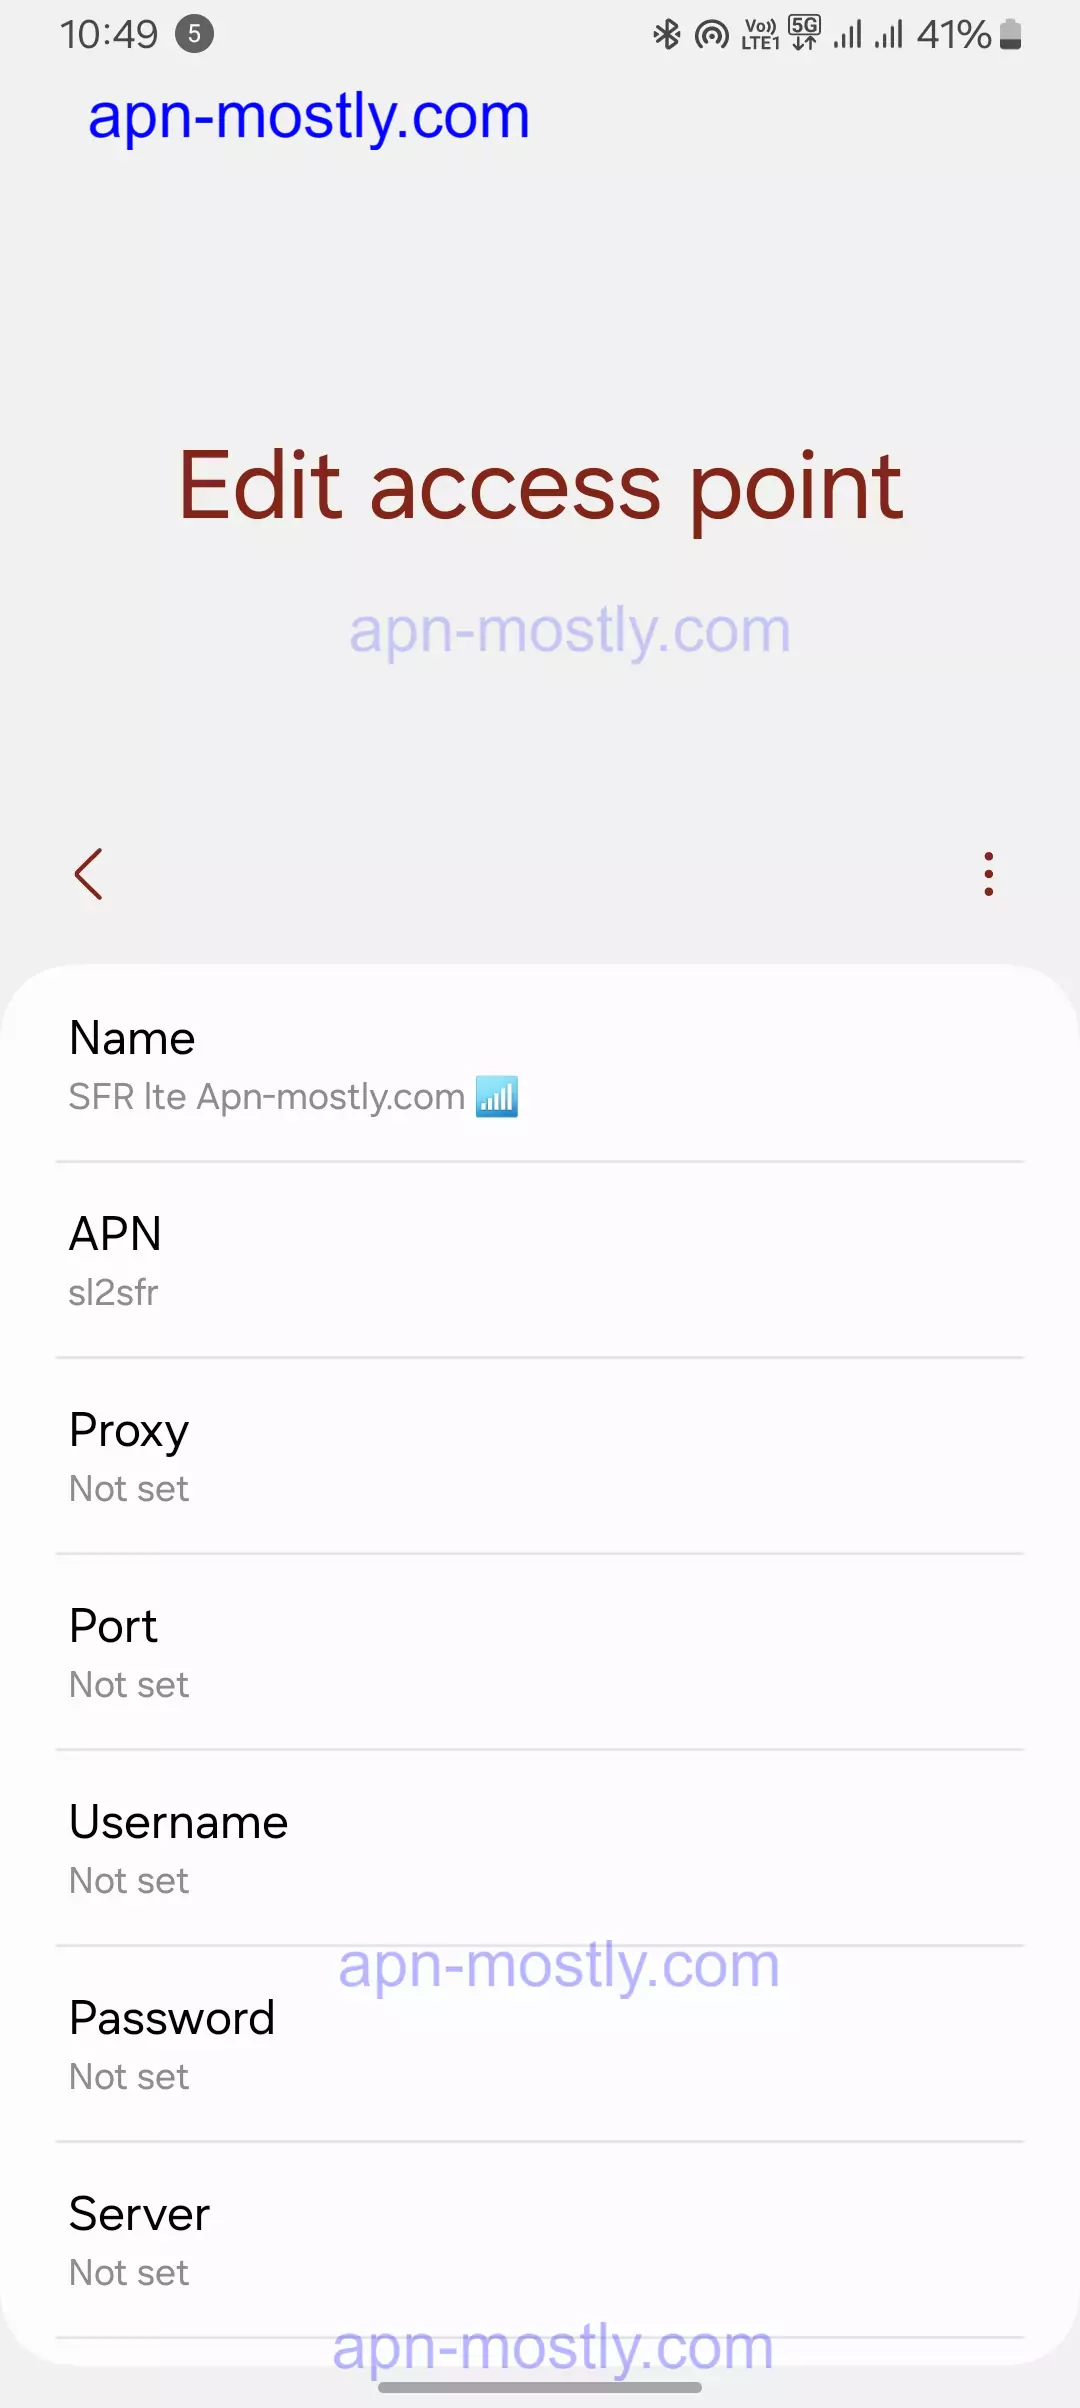
| Name | SFR LTE |
| APN | sl2sfr |
| Proxy | |
| Port | |
| Username | |
| Password | |
| Server | |
| MMSC | |
| Multimedia message proxy | |
| Multimedia message port | |
| MCC | |
| MNC | |
| Authentication type | |
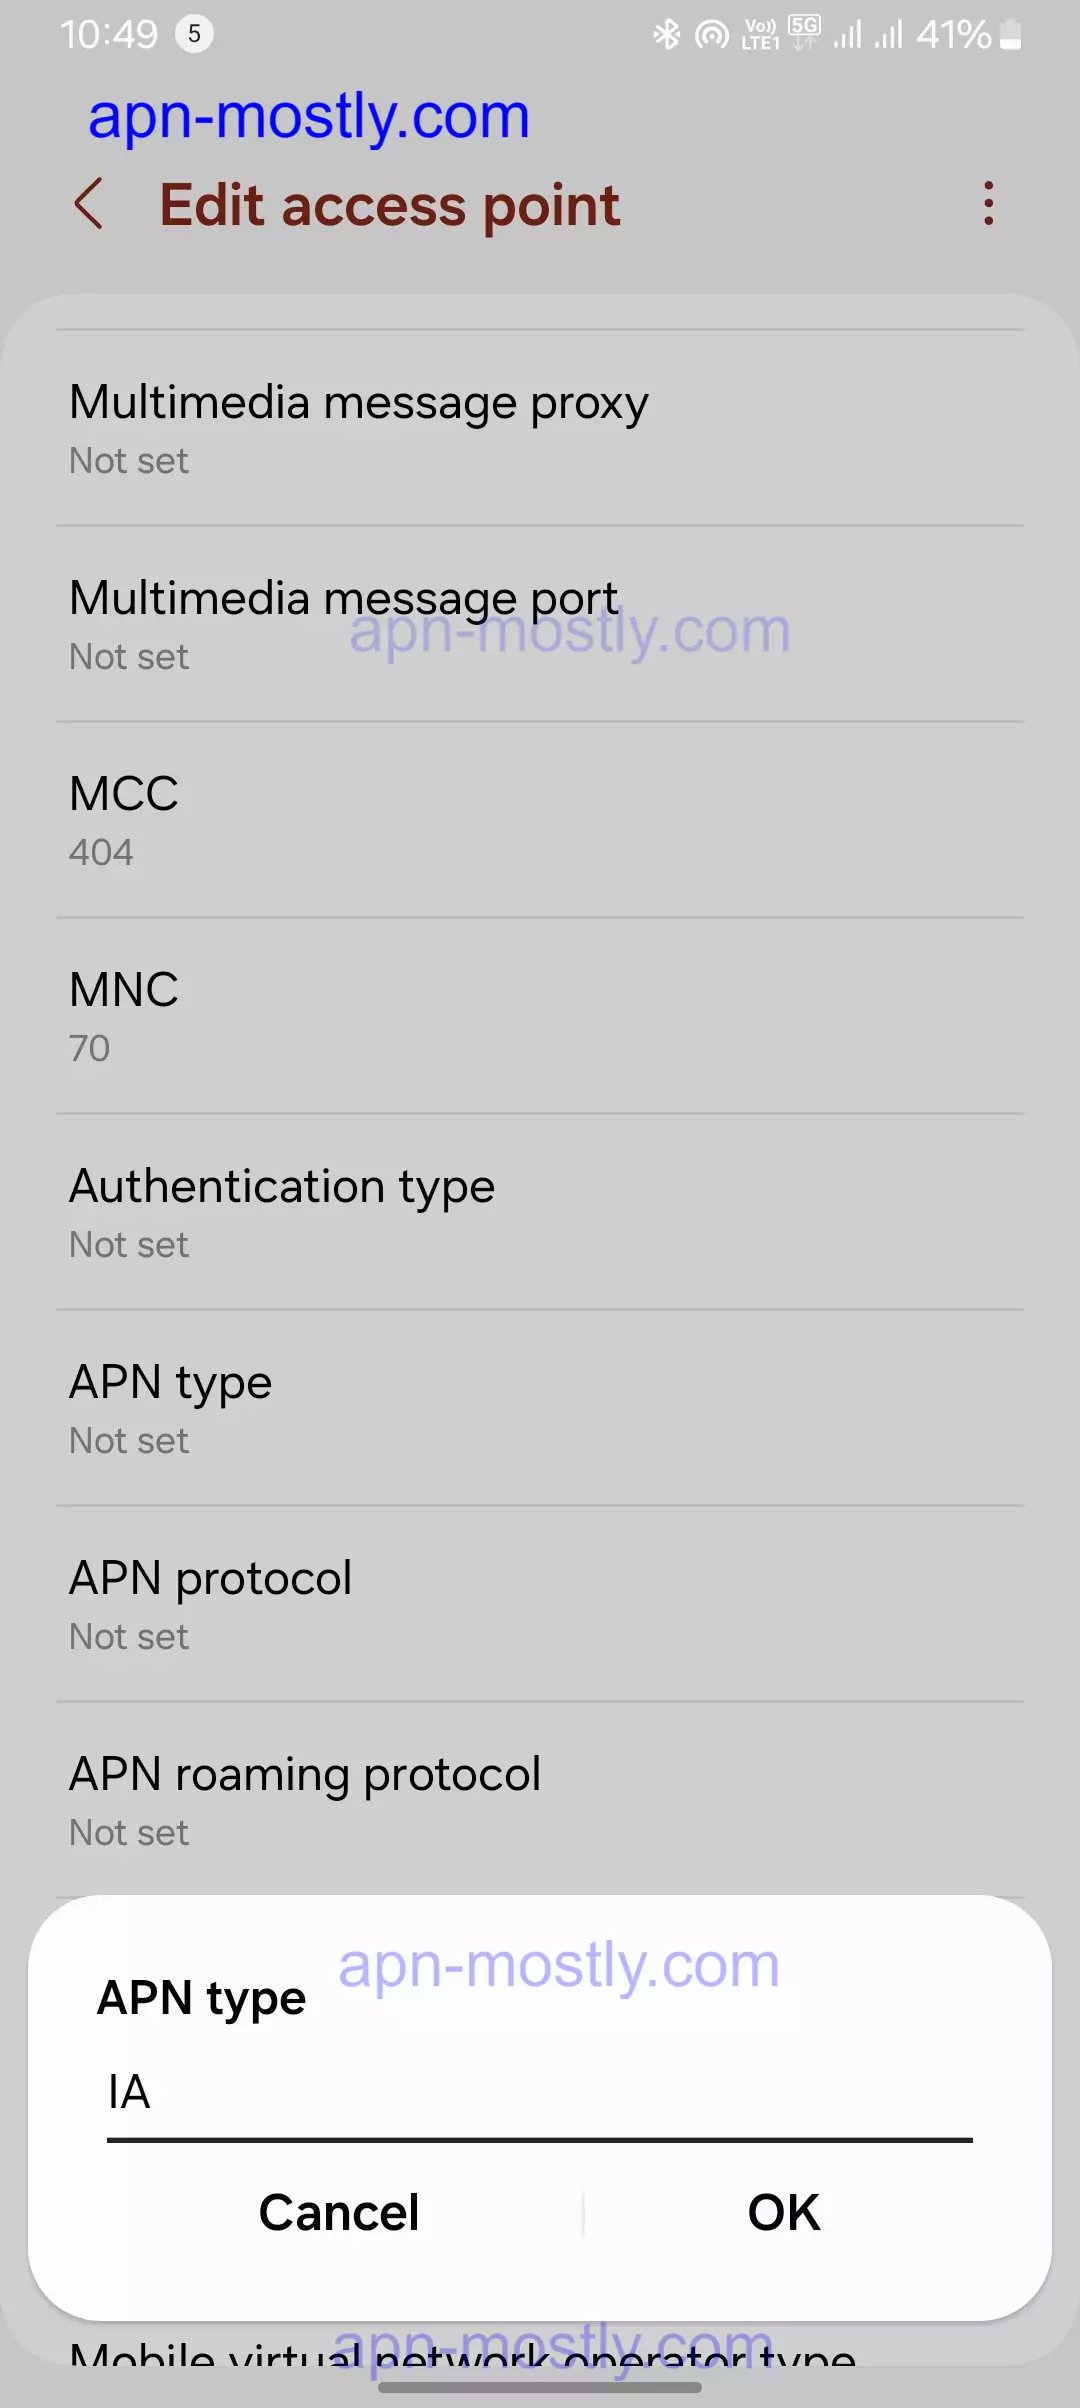
| APN type | IA |
| APN protocol | IPV4/IPV6 |
| APN roaming protocol | IPV4 |
| Bearer | UNSPECIFIED |
| Mobile virtual network operator type | |
| Mobile virtual network operator value | |
| Restart Android to apply new SFR LTE APN settings. |


SFR WEBPHONE APN Settings
| Field | Value |
| Name | SFR WEBPHONE |
| APN | SL2SFR |
| Proxy | |
| Port | |
| Username | |
| Password | |
| Server | |
| MMSC | HTTP://MMS1 |
| Multimedia message proxy | 10.151.0.1 |
| Multimedia message port | 8080 |
| MCC | |
| MNC | |
| Authentication type | |
| APN type | DEFAULT,MMS,SUPL,FOTA,XCAP |
| APN protocol | IPV4/IPV6 |
| APN roaming protocol | IPV4 |
| Bearer | UNSPECIFIED |
| Mobile virtual network operator type | |
| Mobile virtual network operator value | |
| Restart Android to apply new SFR webphone APN settings. |
SFR OPTION MODEM APN Settings
| Field | Value |
| Name | SFR OPTION MODEM |
| APN | WEBSFR |
| Proxy | |
| Port | |
| Username | |
| Password | |
| Server | |
| MMSC | |
| Multimedia message proxy | |
| Multimedia message port | |
| MCC | |
| MNC | |
| Authentication type | NONE |
| APN type | DUN |
| APN protocol | IPV4/IPV6 |
| APN roaming protocol | IPV4 |
| Bearer | UNSPECIFIED |
| Mobile virtual network operator type | |
| Mobile virtual network operator value | |
| Restart Android to apply new SFR option modem APN settings. |
SFR IMS APN Settings
| Field | Value |
| Name | SFR IMS |
| APN | IMS |
| Proxy | |
| Port | |
| Username | |
| Password | |
| Server | |
| MMSC | |
| Multimedia message proxy | |
| Multimedia message port | |
| MCC | |
| MNC | |
| Authentication type | |
| APN type | IMS |
| APN protocol | IPV4/IPV6 |
| APN roaming protocol | IPV4 |
| Bearer | UNSPECIFIED |
| Mobile virtual network operator type | |
| Mobile virtual network operator value | |
| Restart Android to apply new SFR IMS APN settings. |
SFR MCC-MNC Values
| MCC | MNC |
| 208 | 09 |
| 208 | 10 |
Disclaimer: Ensure you restart your Android device after applying the new APN settings for them to take effect.
The main APN you’ll need for SFR is sl2sfr. In some cases, your device might require additional information for the APN settings. These might include Username, Password, or Authentication type. However, these fields are usually left blank for SFR.
Configuring SFR APN Settings (General Steps)
The specific steps to access APN settings can vary slightly depending on your device manufacturer. Here’s a general guideline that applies to most devices:
- Open the Settings app on your device.
- Navigate to the Network & Internet section (or similar depending on your device). This might be under Connections or Mobile Networks on some devices.
- Look for Mobile Network or Cellular Network options.
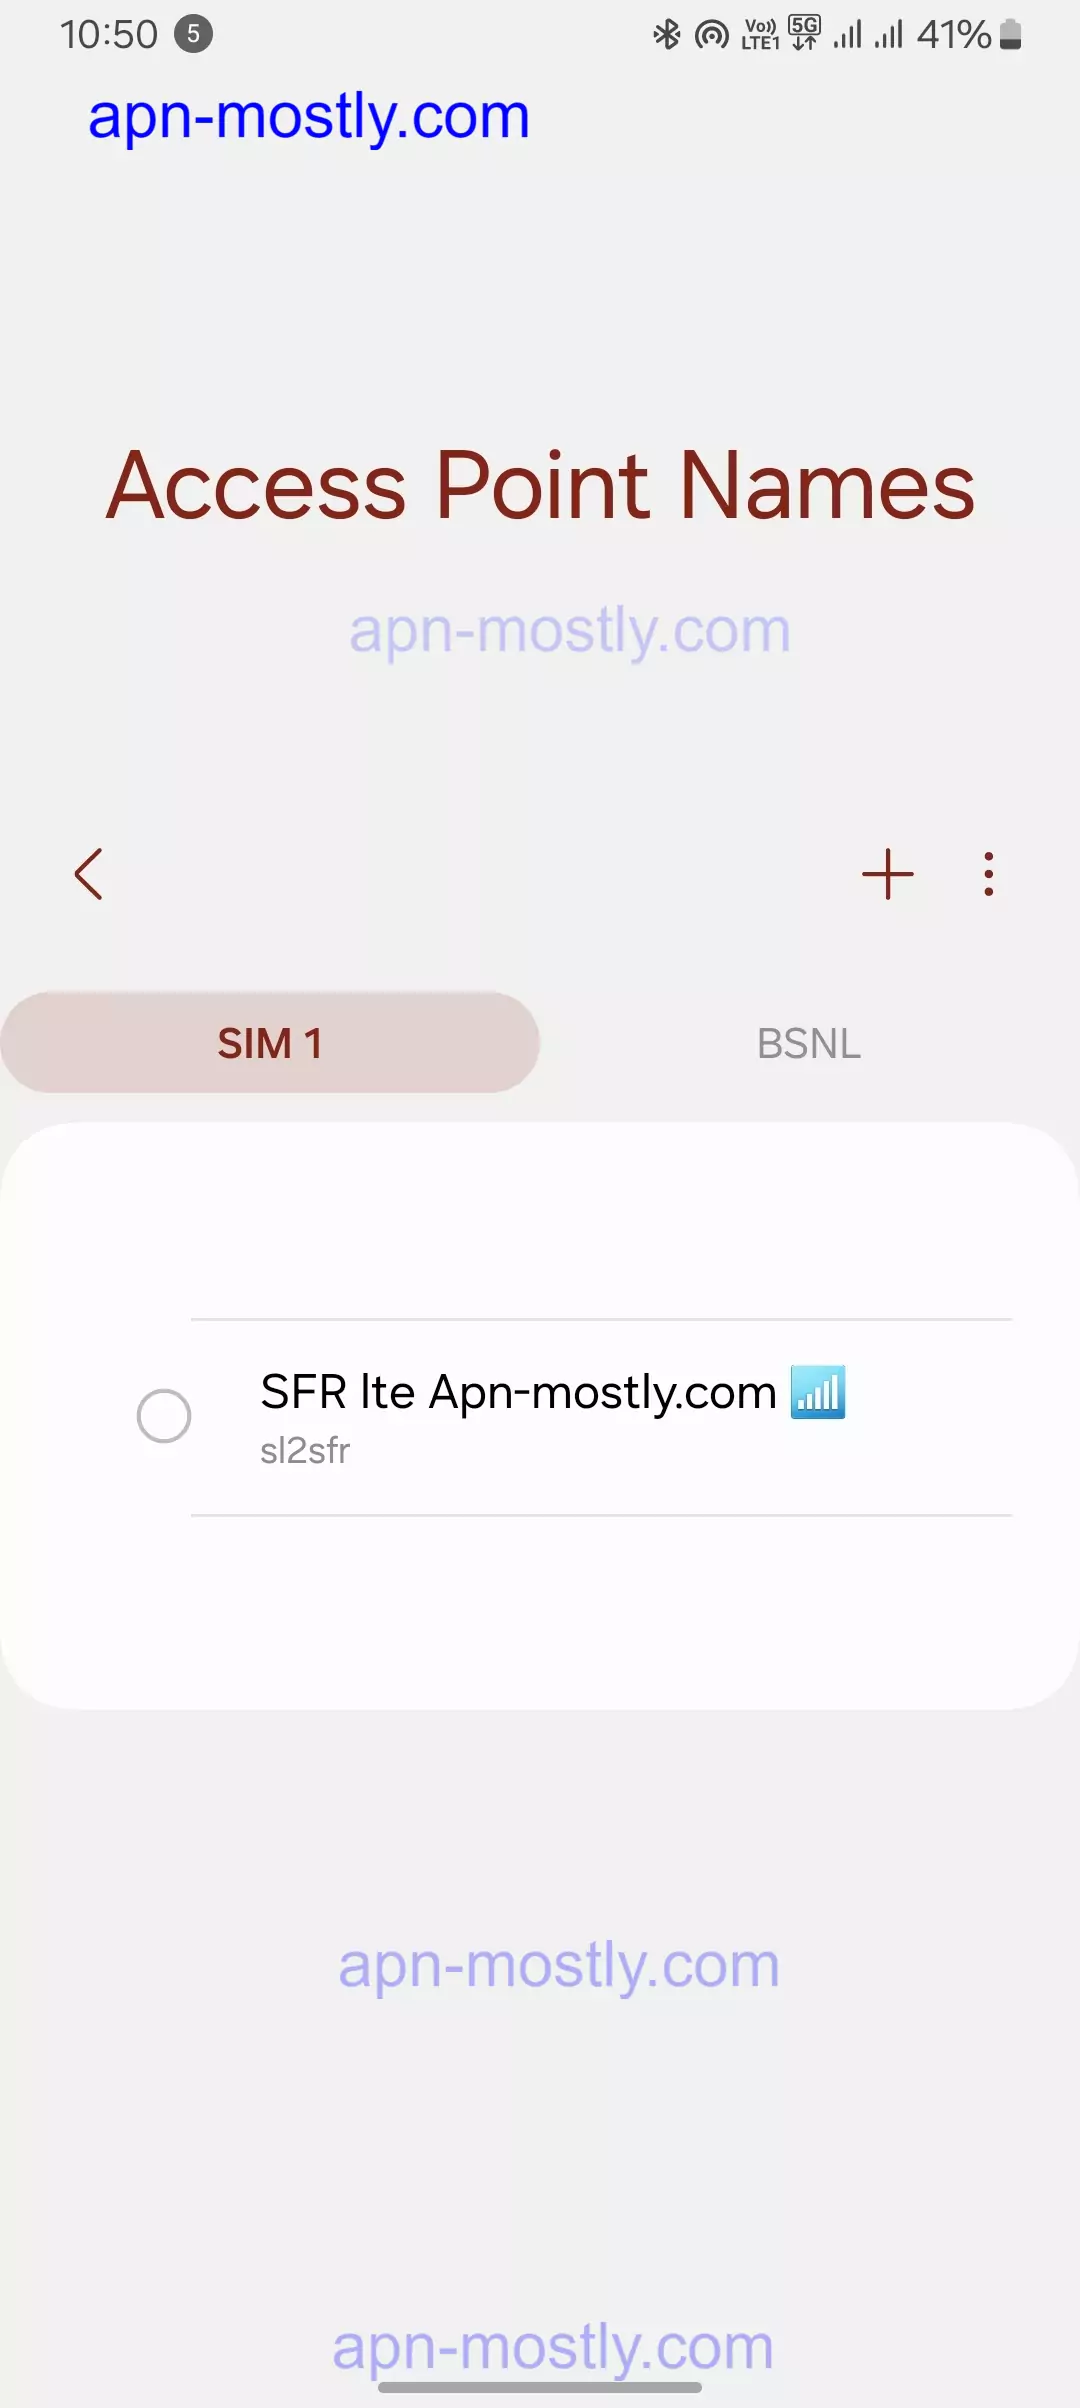
- Tap on Advanced or Access Point Names (APNs).
- You might see a list of existing APN profiles. If you don’t want to modify an existing profile, tap the + button to create a new one.
Configuring SFR APN Settings (Detailed Steps – Optional)
Instructions for specific device operating systems (Android, iOS, etc.) can be found online. Search for “Configure SFR APN on [Your Device Model]” for detailed steps.
Reset or Delete the SFR APN
On Android
- Open Settings:
- Begin by navigating to the “Settings” app on your Android device. This app is typically found in the app drawer or on the home screen.
- Access Network Settings:
- Inside the Settings app, search for “Network & Internet” or “Connections.” The terminology may differ based on your device and Android version. When I was troubleshooting my Samsung device with a battery level of 72%, the option was labeled as “Connections.”
- Go to Mobile Network:
- Within the network settings, locate and tap on “Mobile Network” or “Cellular Networks.” This will open the mobile network settings page.
- Access Configuration Settings:
- On the mobile network settings page, find “Access Point Names” or “APNs.” Tap on it to enter the configuration settings.
- Select Configuration:
- You will now see a list of access point configurations, including the one you wish to delete or reset. Tap on it to select it.
- Delete the Configuration:
- To remove the configuration, tap on the three-dot menu (usually situated at the top-right corner) and choose “Delete APN.” Confirm the action when prompted.
- OR
- To remove the configuration, tap on the three-dot menu (usually situated at the top-right corner) and choose “Delete APN.” Confirm the action when prompted.
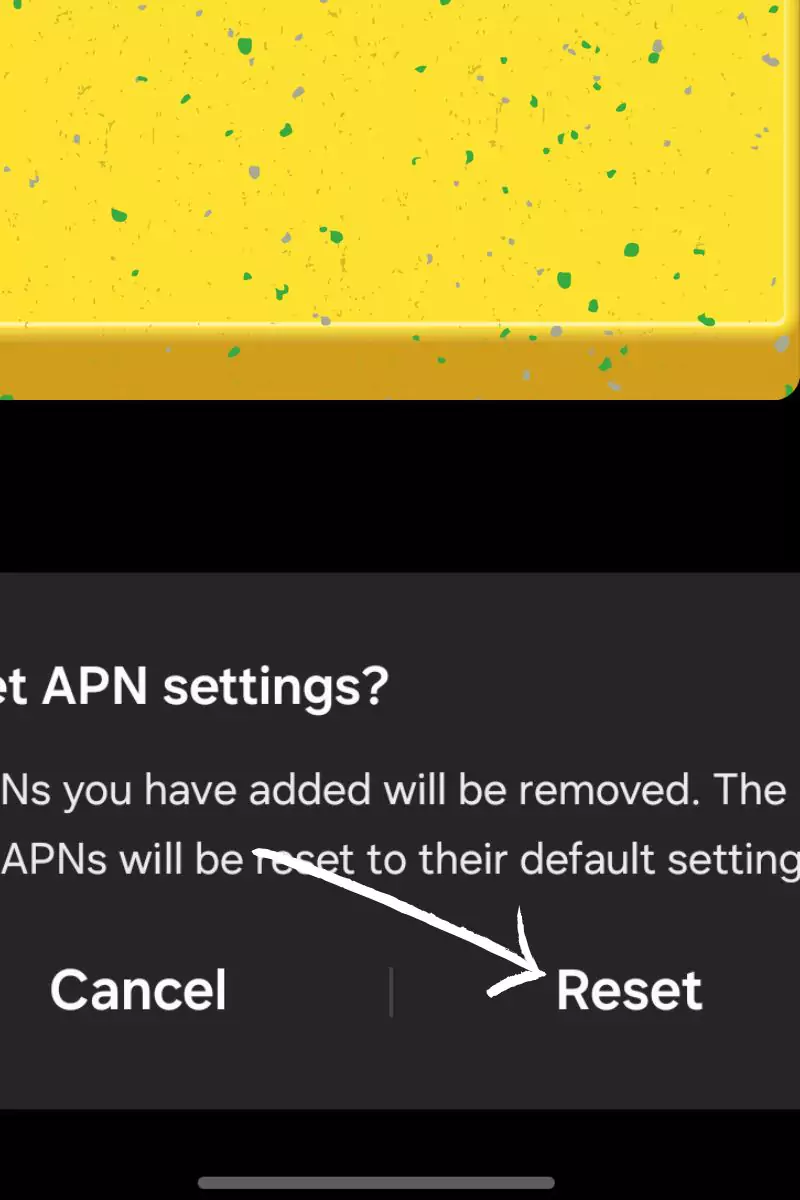
- Reset to Default:
- To restore the configuration to its default settings, tap on the three-dot menu and select “Reset to default” or “Reset APN settings.” This will revert the configuration to the original settings provided by your carrier.
On iOS (iPhone/iPad)
- Open Settings:
- Launch the “Settings” app on your iOS device. You can locate this app on your home screen.
- Access Mobile Data Settings:
- Scroll through the settings and tap on “Mobile Data” or “Cellular.” This will open the mobile data settings.
- Go to Mobile Data Network:
- In the mobile data settings, tap on “Mobile Data Network.” This will show the access point configuration for your carrier.
- Reset Configuration:
- To restore the configuration to the default settings provided by your carrier, scroll down to the bottom and tap on “Reset Settings.” Confirm the action when prompted.
Additional Tips
- Restart Your Device:
- After removing or restoring the access point configuration, it’s a good idea to restart your device. This ensures that the changes take effect and helps prevent any residual connectivity issues.
- Manually Add Configuration:
- If you’ve deleted the configuration and need to set it up again, you can manually add a new one with the correct settings provided by your carrier. These settings can usually be found on their website or by contacting their customer support.
Troubleshooting SFR APN Issues
If you’re still facing issues after configuring the APN settings, try these troubleshooting steps:
- Verify APN Configuration:
- Check Hidden APN Settings: One thing I’ve learned is that carriers like SFR sometimes use hidden settings that are not visible in the standard APN configuration. To access these, you may need root access or specialized apps that can reveal hidden APNs. In my case, when I had issues connecting to SFR’s network with a battery percentage of 68%, using a root-enabled app to check for hidden APNs helped me identify and correct a mismatched setting.
- Use Correct MCC and MNC Codes:
- Mobile Country Code (MCC) and Mobile Network Code (MNC): It’s crucial to ensure that the MCC (208 for France) and MNC (10 for SFR) are correctly set in your APN settings. In my experience, incorrect codes can prevent the device from connecting properly. I once spent hours trying to troubleshoot a connection issue with SFR, only to realize that I had accidentally entered the wrong MNC code.
- Network Mode and Frequency Bands:
- Check Supported Bands: Another important aspect is verifying that your device supports the frequency bands used by SFR. Different regions may use different bands, such as LTE bands 3, 7, and 20. When I was traveling in France with a battery level of 73%, I noticed that my device wasn’t connecting to SFR’s network. After checking the supported bands, I realized that my device was missing one of the key bands used in that region.
- Carrier-Specific Firmware:
- Update Firmware: Some carriers, including SFR, might release firmware updates optimized for their network. It’s essential to ensure that your device firmware is up to date. In my case, updating to the latest carrier-specific firmware resolved connectivity issues I was facing with SFR.
- Clear Network Settings Cache:
- Reset Network Settings: Sometimes, clearing the network settings cache can resolve connectivity issues. This can usually be done by resetting the network settings on your device. When I was struggling with intermittent connection problems on SFR’s network, resetting the network settings with a battery percentage of 71% helped me establish a stable connection.
- Advanced Network Settings:
- DNS Settings: Manually setting DNS to Google (8.8.8.8, 8.8.4.4) or Cloudflare (1.1.1.1) DNS servers can sometimes resolve issues with connectivity and speed. In my experience, switching to Google DNS servers improved my browsing speed and resolved some connectivity issues I had with SFR.
- APN Protocol and Roaming Protocol:
- Set to IPv4/IPv6: Ensure that the APN protocol is set to IPv4/IPv6. Some networks, like SFR, require dual-stack protocols for compatibility. I learned this the hard way when I couldn’t connect to SFR’s network until I changed the APN protocol to IPv4/IPv6.
- Roaming Settings:
- Enable Data Roaming: If you’re near a border or in a region where network coverage is spotty, enabling data roaming can sometimes help maintain a stable connection. When I was traveling close to the French-Spanish border with a battery level of 67%, enabling data roaming allowed me to stay connected to SFR’s network even in areas with weak coverage.
- Check for Carrier Provisioning Updates:
- Carrier Settings Update: Carriers like SFR sometimes push updates that optimize APN and network settings. It’s worth checking if there’s an update available for SFR settings. In my case, applying a carrier settings update resolved some persistent connectivity issues I had been facing.
- Disable APN Switching Apps:
- Third-Party Apps: If you use apps that manage or switch APNs (e.g., for dual SIM devices), ensure they’re configured correctly or temporarily disable them to rule out conflicts. I once had a third-party APN switching app that was causing conflicts with SFR’s settings, and disabling it resolved my connectivity problems.
These are just a few of the advanced troubleshooting steps I’ve used to resolve issues with SFR APN settings. Other techniques like manual network selection, creating custom APN profiles, using diagnostic tools, checking for physical barriers and interference, inspecting the SIM card, and contacting SFR support can also be helpful in specific situations.
Conclusion
That is it for the blog post today. This is all about the internet configuration setup for SFR France to get the fastest internet speed. I have already tried all these settings on my devices and for one of my friends who lives in France with a Google Pixel 6A. As per the outcomes, it is good and working. Moreover, I tried to include all the screenshots so it would be easier for Android users to set it up. I hope you found the information helpful. If you did, then do let me know in the comments section. Have a nice day. But, before you go, if you have any doubts or questions, do let me know in the comment section.