
Here is exactly how you can set up APN settings on Android. While we’ve provided you with all the APN configurations for both Android and iOS, it’s common for people to be unsure of the exact steps to setup an Access Point Name on Android. In today’s blog post, we will guide you through the process with detailed screenshots and videos to help you get started.
Step-by-Step Guide to Setting Up APN on Android
1. Accessing APN Settings
Before we proceed to setup the APN, it’s essential to know how to access those settings, specifically where the APN settings are located on Android. Follow these steps to navigate to the settings, and then we can proceed to add an APN.
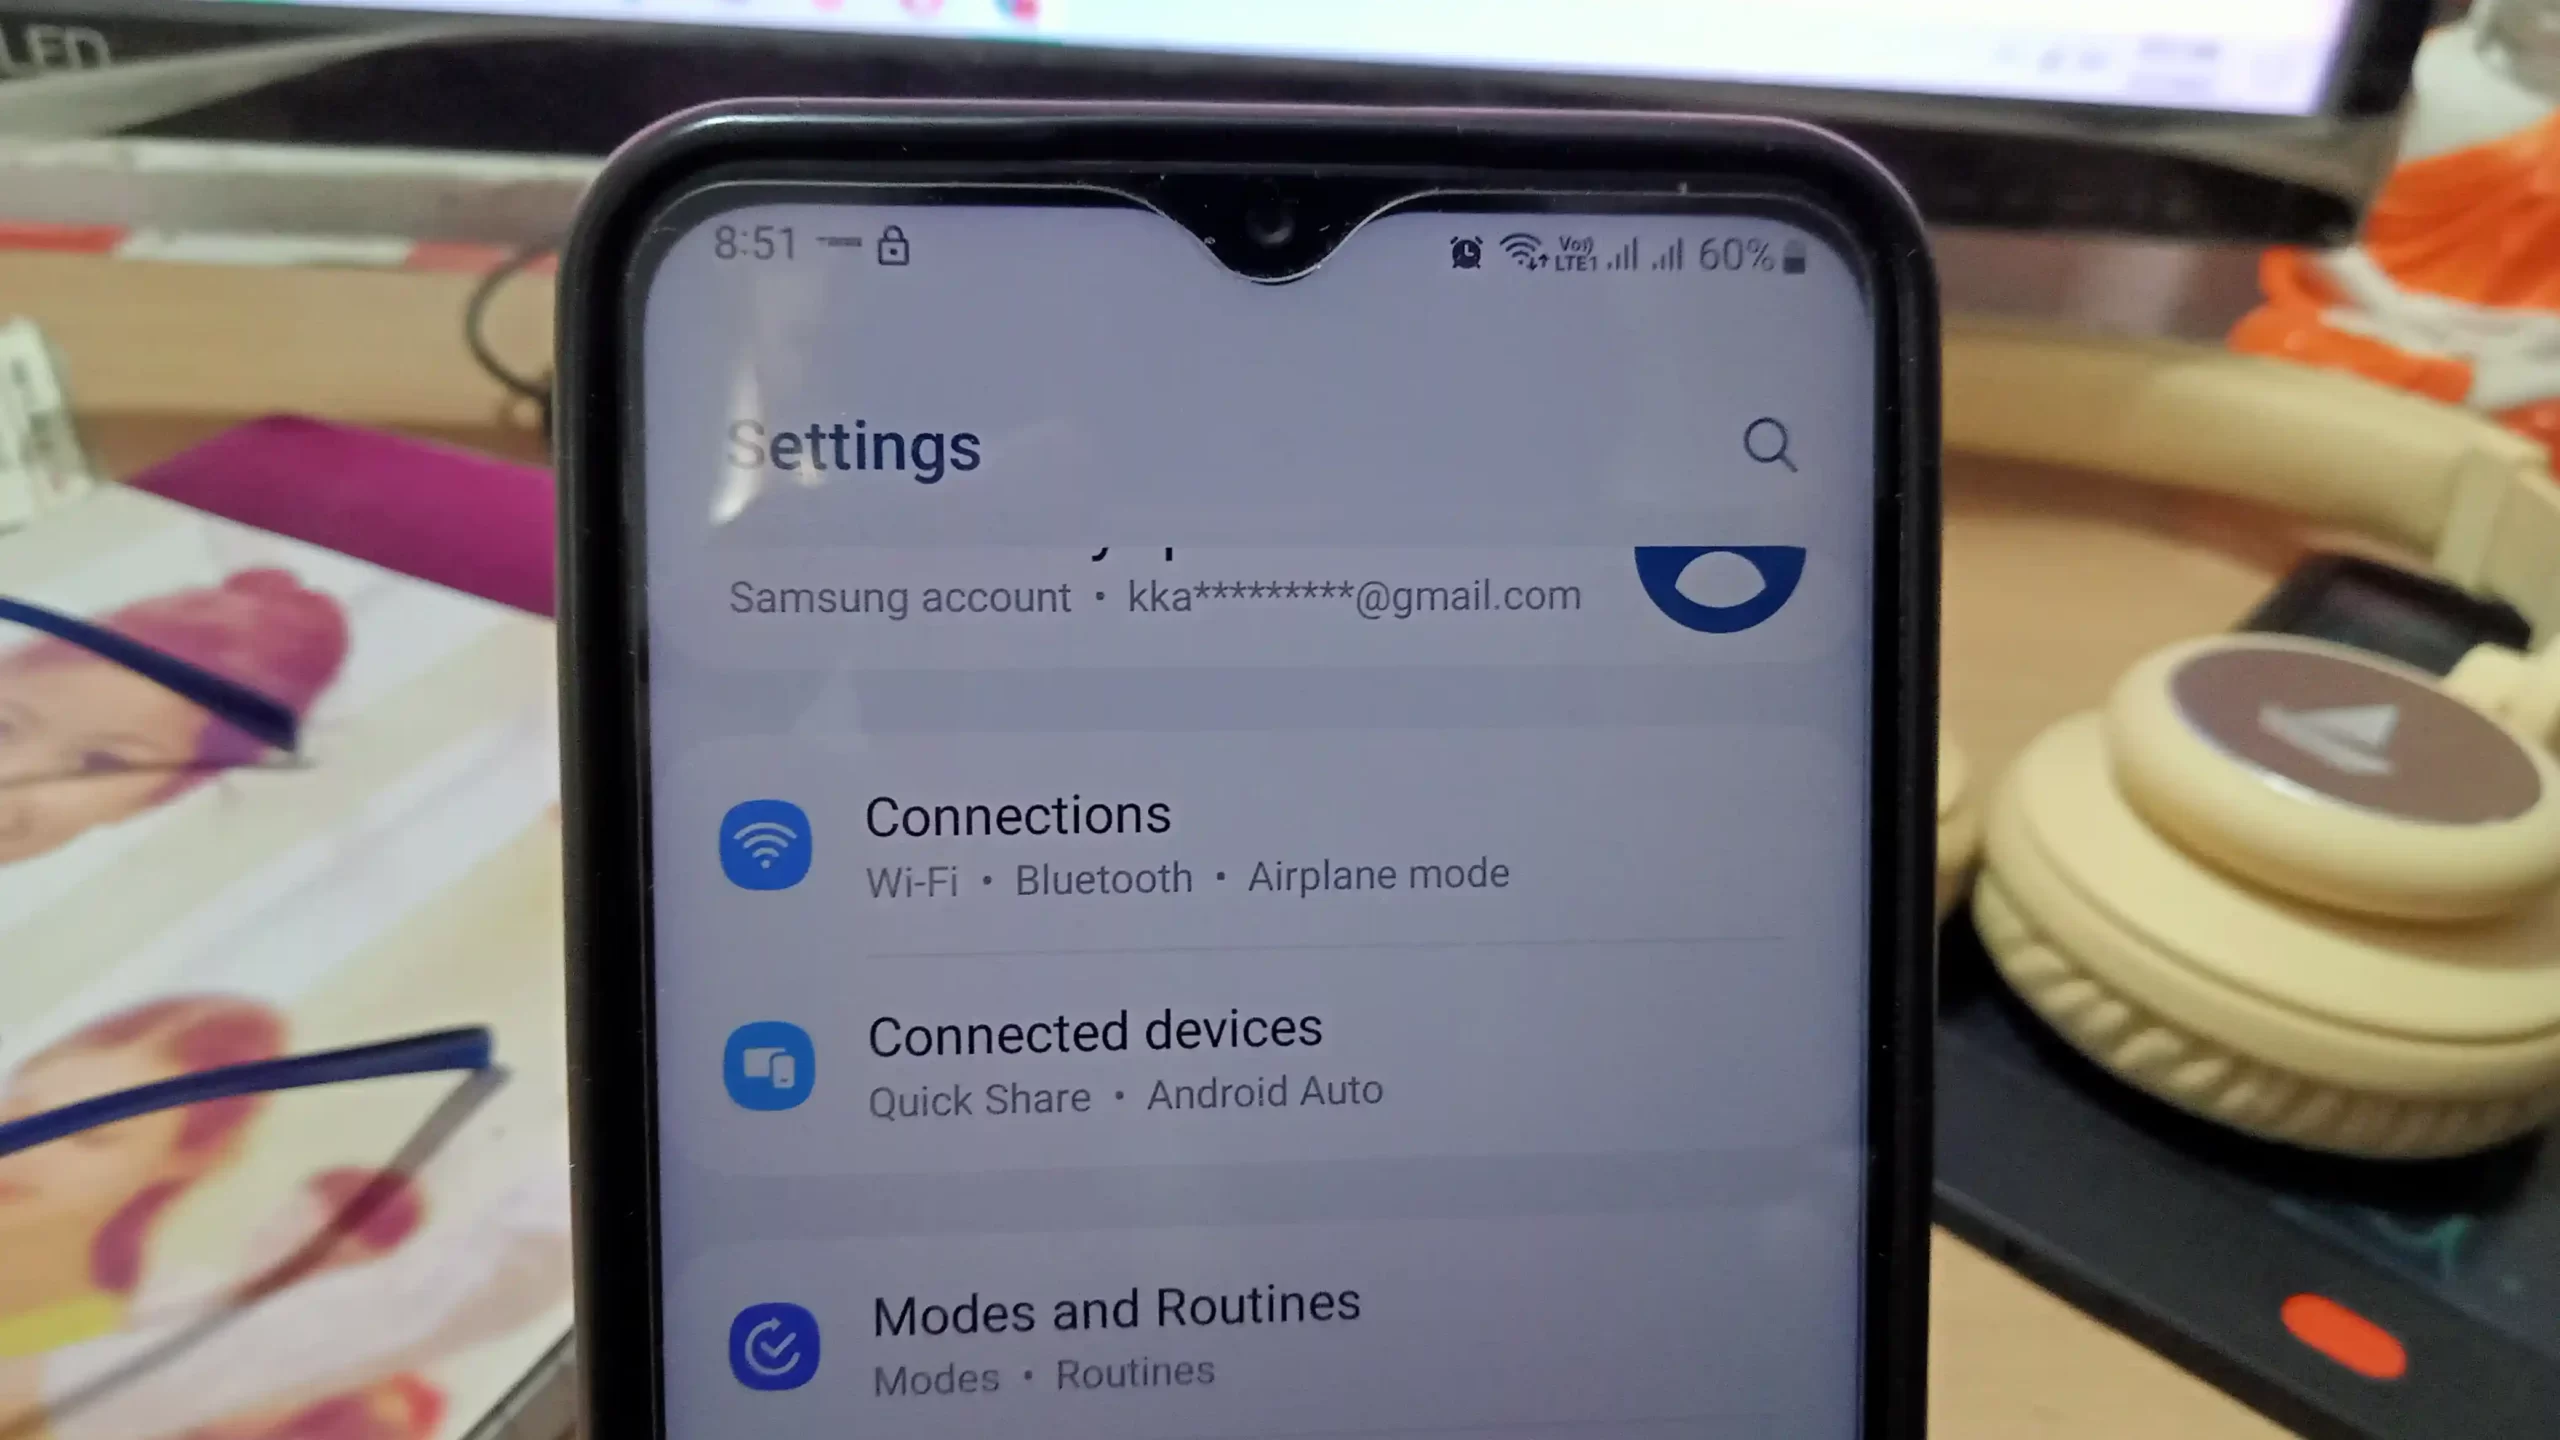
- Open the Settings app on your Android device.
- Navigate to Wireless & Networks or Network & Internet.
- Select Mobile networks.
- Look for the Access Point Names (APN) option. It might be under More networks or similar settings menu.

2. Adding a New APN
Now, this is the step that you need to follow, and the values that you have to enter can be found in the APN category of APN-Mostly.com. Alternatively, you can search for your carrier provider based on the SIM you are using. Once you have identified the appropriate APN for that carrier, locate the tables on their website. Simply copy the values from those tables and paste them into the corresponding fields.
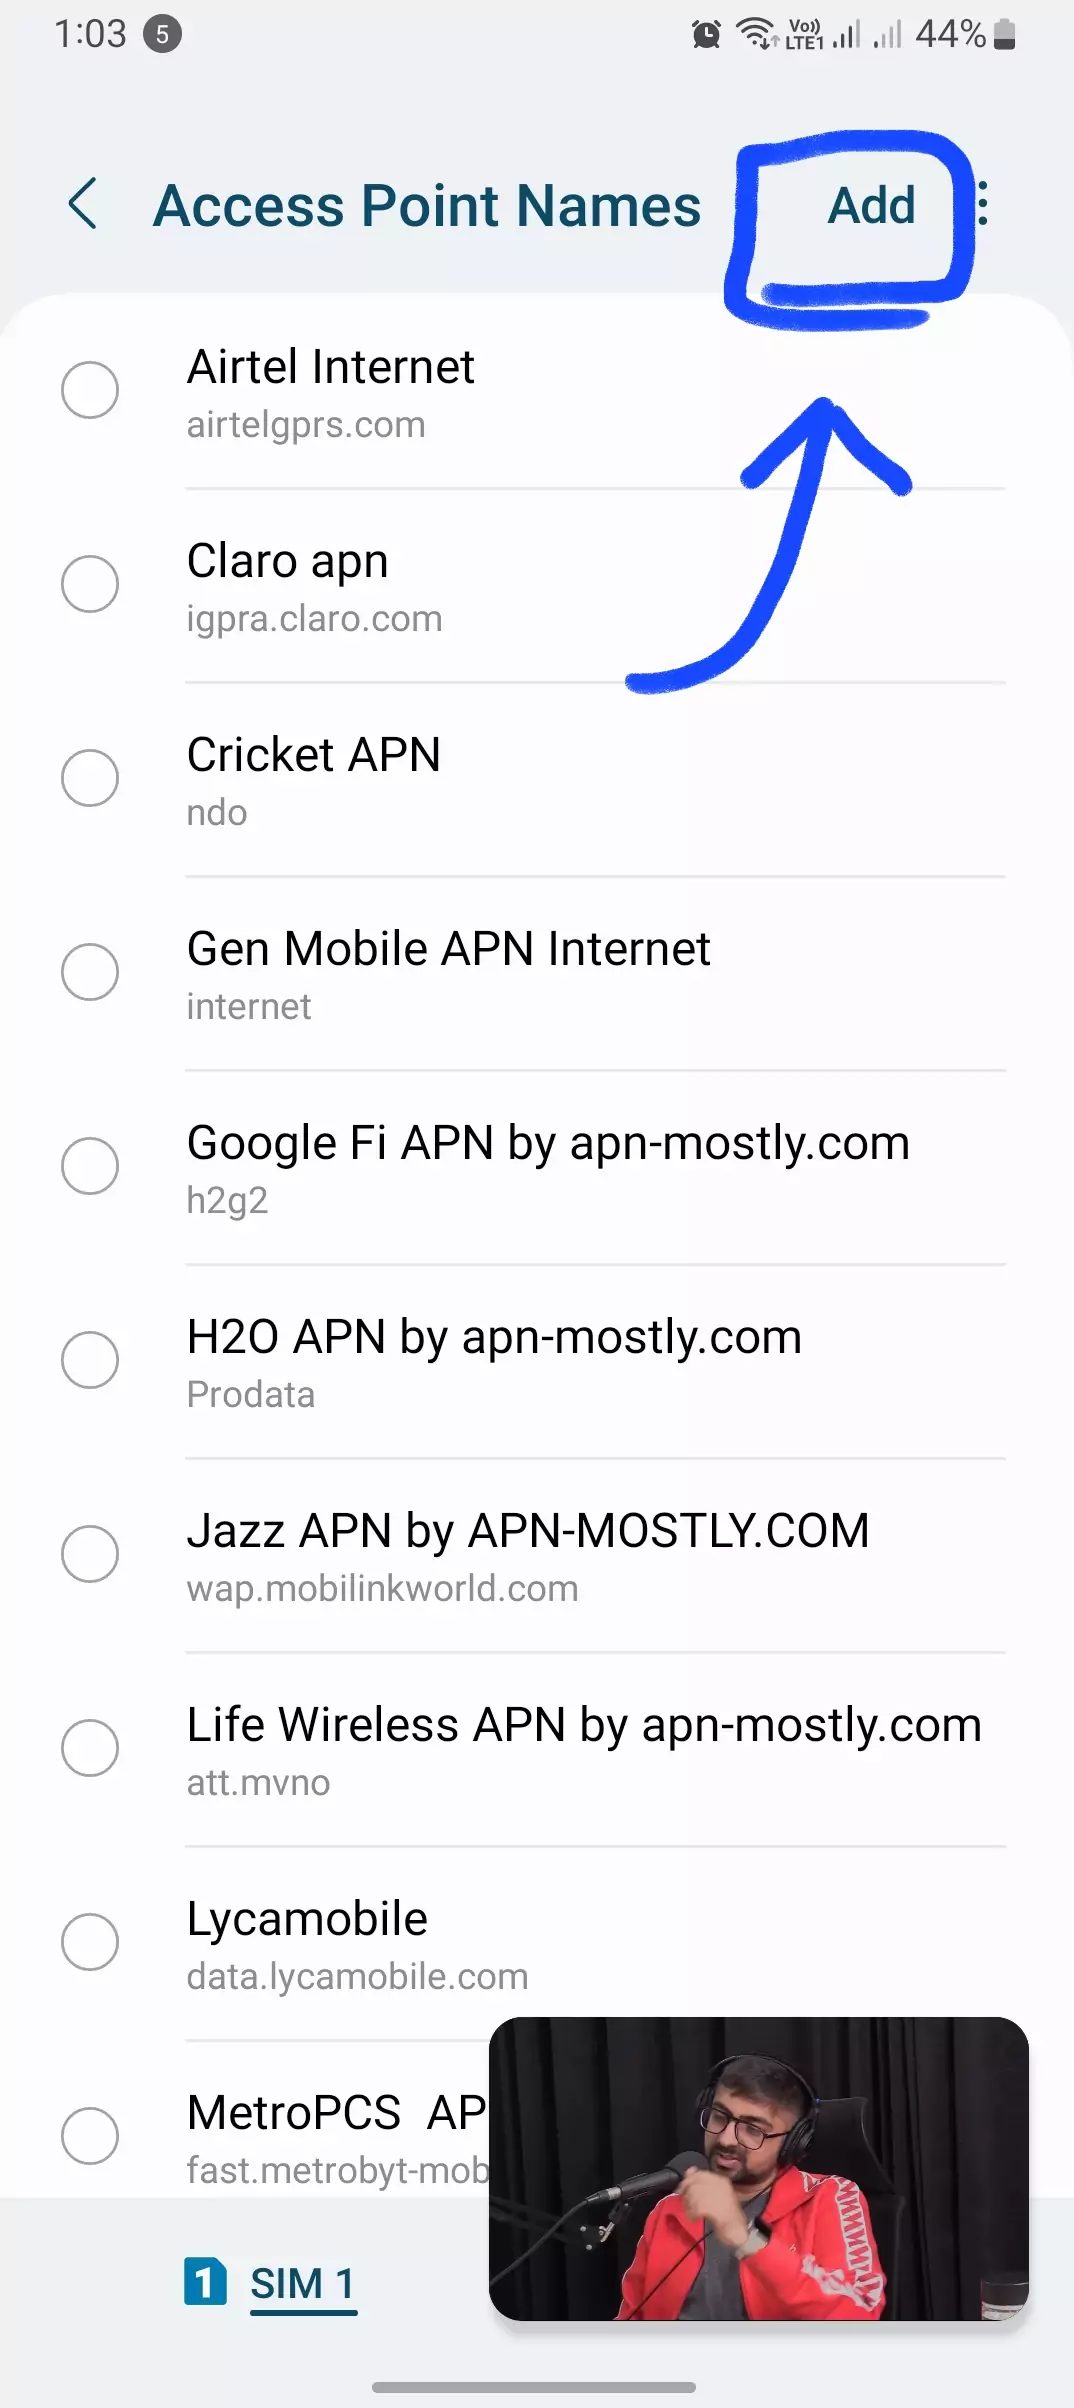
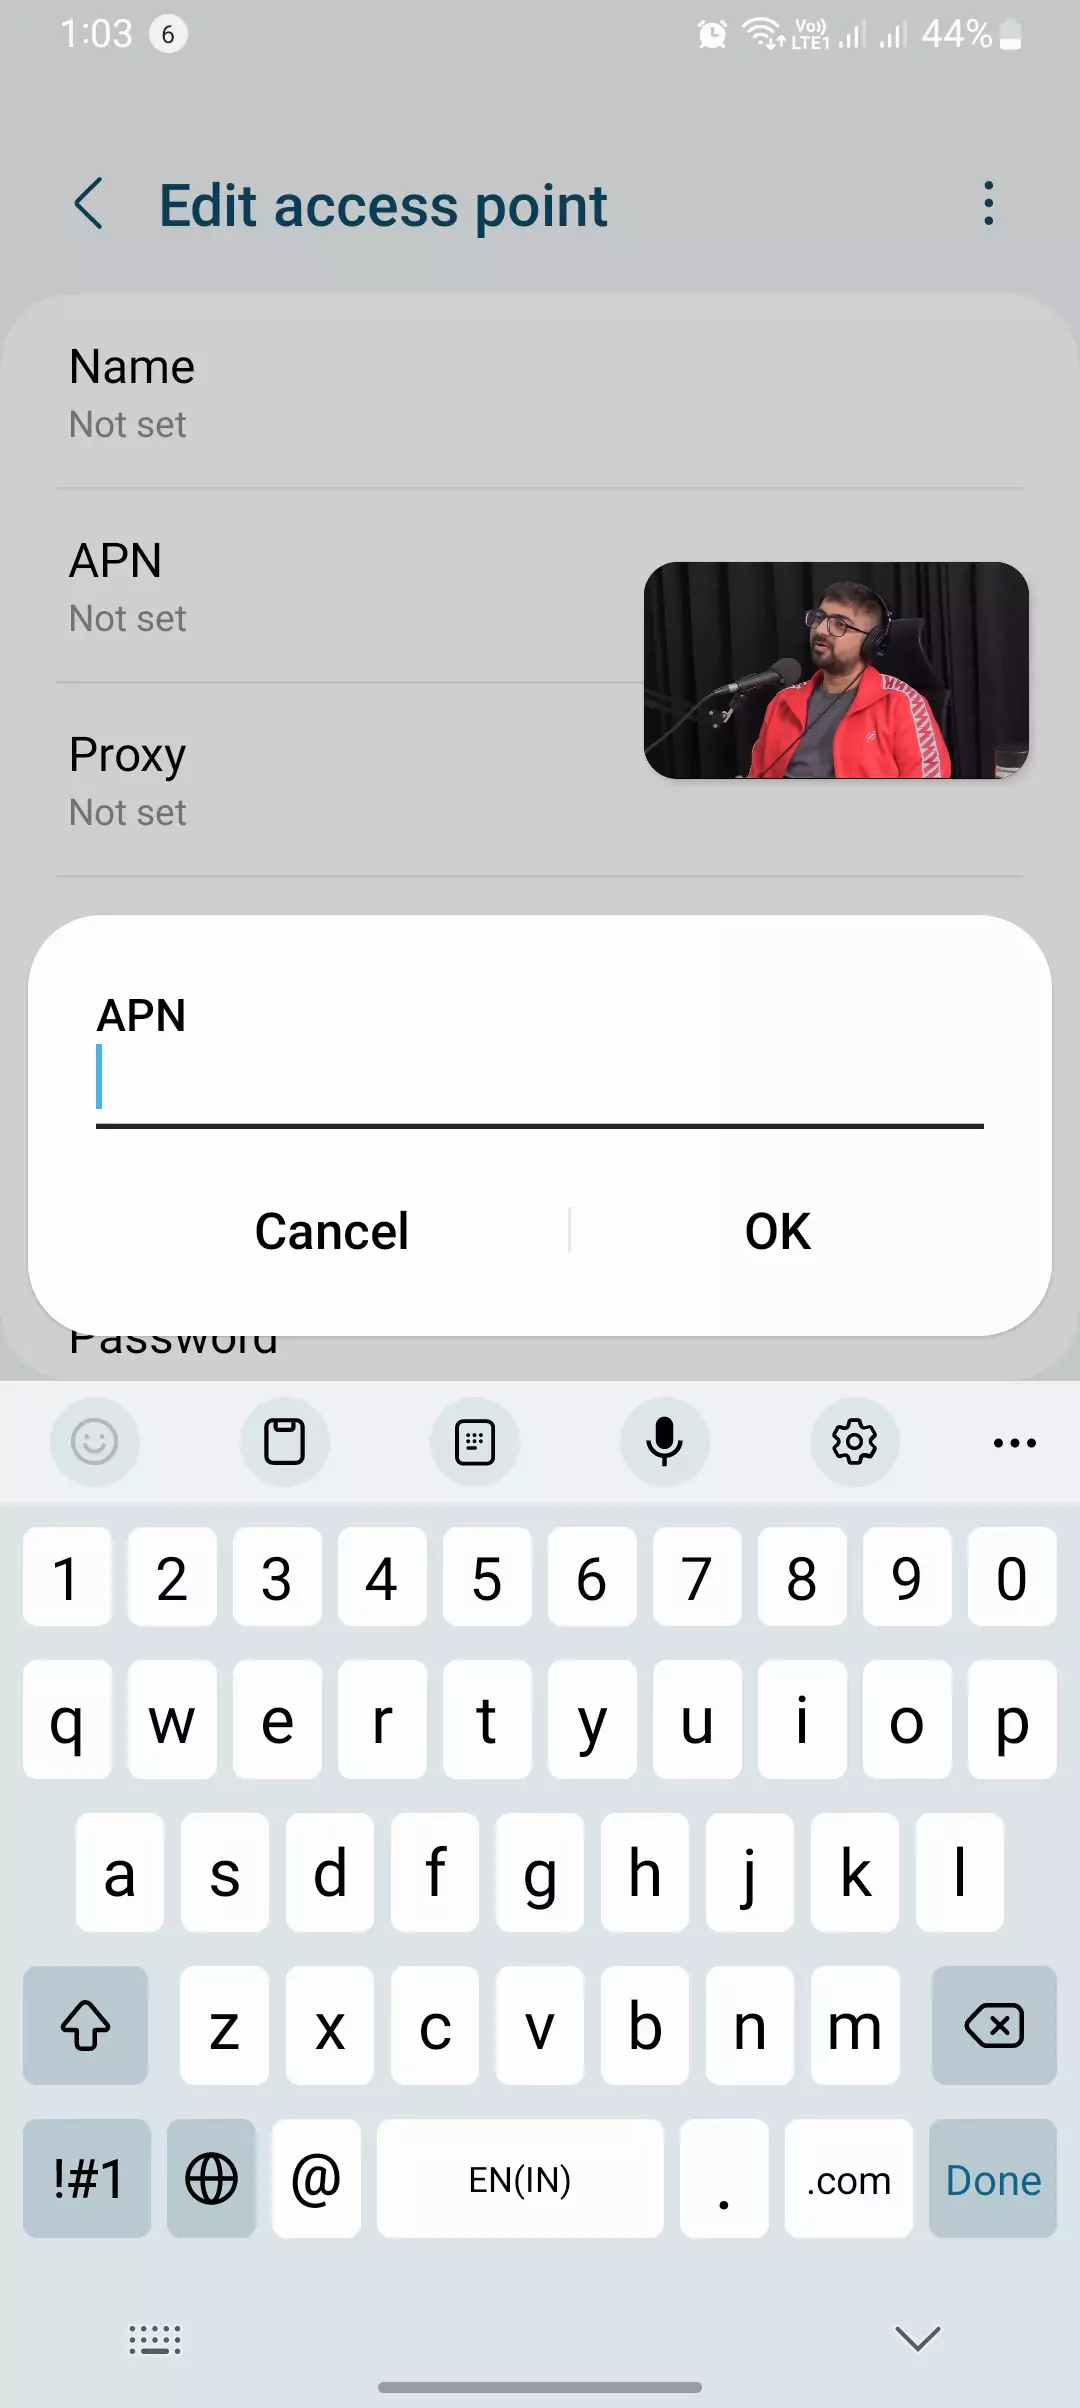
- Tap the Add or Plus (+) icon or the Menu button and choose New APN.
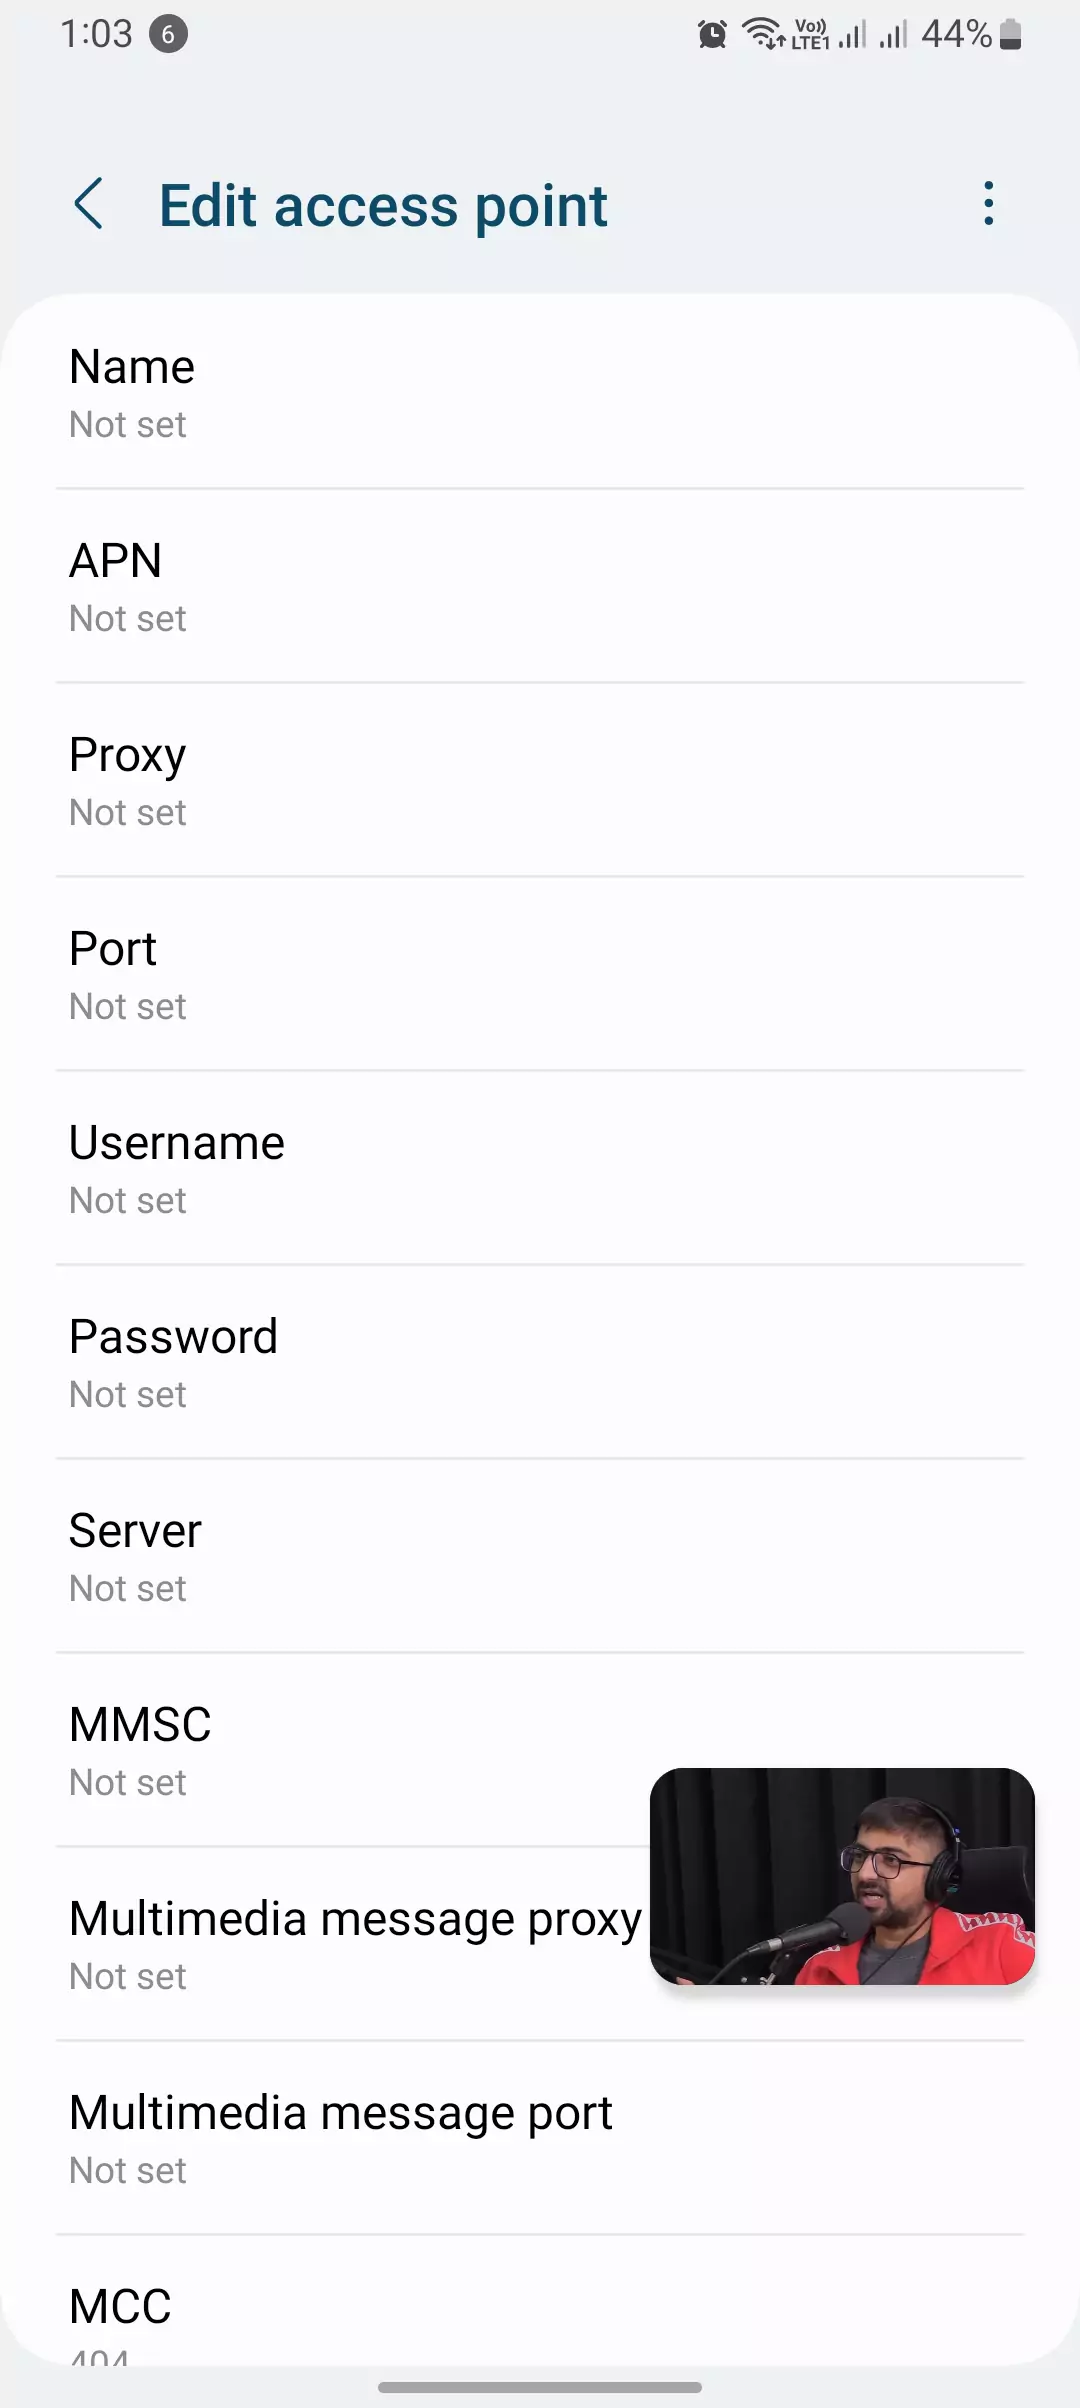
- Enter a Name for the new APN profile, such as “My Carrier APN”.
- Enter the APN settings provided by your mobile carrier. These details can be found on your carrier’s website or by contacting their customer support.
- For most carriers, the Components of APN settings are as follows:
- Name: Enter the APN name provided by your carrier.
- APN: Enter the APN value provided by your carrier.
- Proxy: If applicable, enter the proxy value provided by your carrier.
- Port: If applicable, enter the proxy port value provided by your carrier.
- MMSC: If applicable, enter the MMSC value provided by your carrier.
- MMS proxy: If applicable, enter the MMS proxy value provided by your carrier.
- MMS port: If applicable, enter the MMS port value provided by your carrier.
- MCC (Mobile Country Code) and MNC (Mobile Network Code): These codes identify the country and mobile network operator, respectively. They are usually automatically detected by the device.
- Authentication Type: Specifies the type of authentication required, such as PAP (Password Authentication Protocol) or CHAP (Challenge Handshake Authentication Protocol).
- Authentication Type: Specifies the type of authentication required, such as PAP (Password Authentication Protocol) or CHAP (Challenge Handshake Authentication Protocol).
- Bearer: This indicates the type of data connection, such as LTE, HSPA, or others. It may be set to default or a specific type depending on your carrier.
- MVNO Type and MVNO Value: These are Mobile Virtual Network Operator settings and are applicable if you are using a mobile virtual network.
- Protocol: Specifies the network protocol to be used, such as IPv4, IPv6, or both.
- Roaming Protocol: Similar to the Protocol setting but specifically for roaming situations.
- Mobile Virtual Private Network (MVPN): Some carriers might have specific settings for VPN connections.
- IPv4/IPv6 Address: This is the IP address assigned to your device. It’s usually assigned automatically, but some carriers may have specific requirements.
- Network Operator: This setting specifies the network operator code. It’s usually automatically detected by the device.
- Authentication via SIM: Some carriers use SIM-based authentication, and there might be settings related to this.
- Carrier Aggregation: For advanced users, carrier aggregation settings may be available.
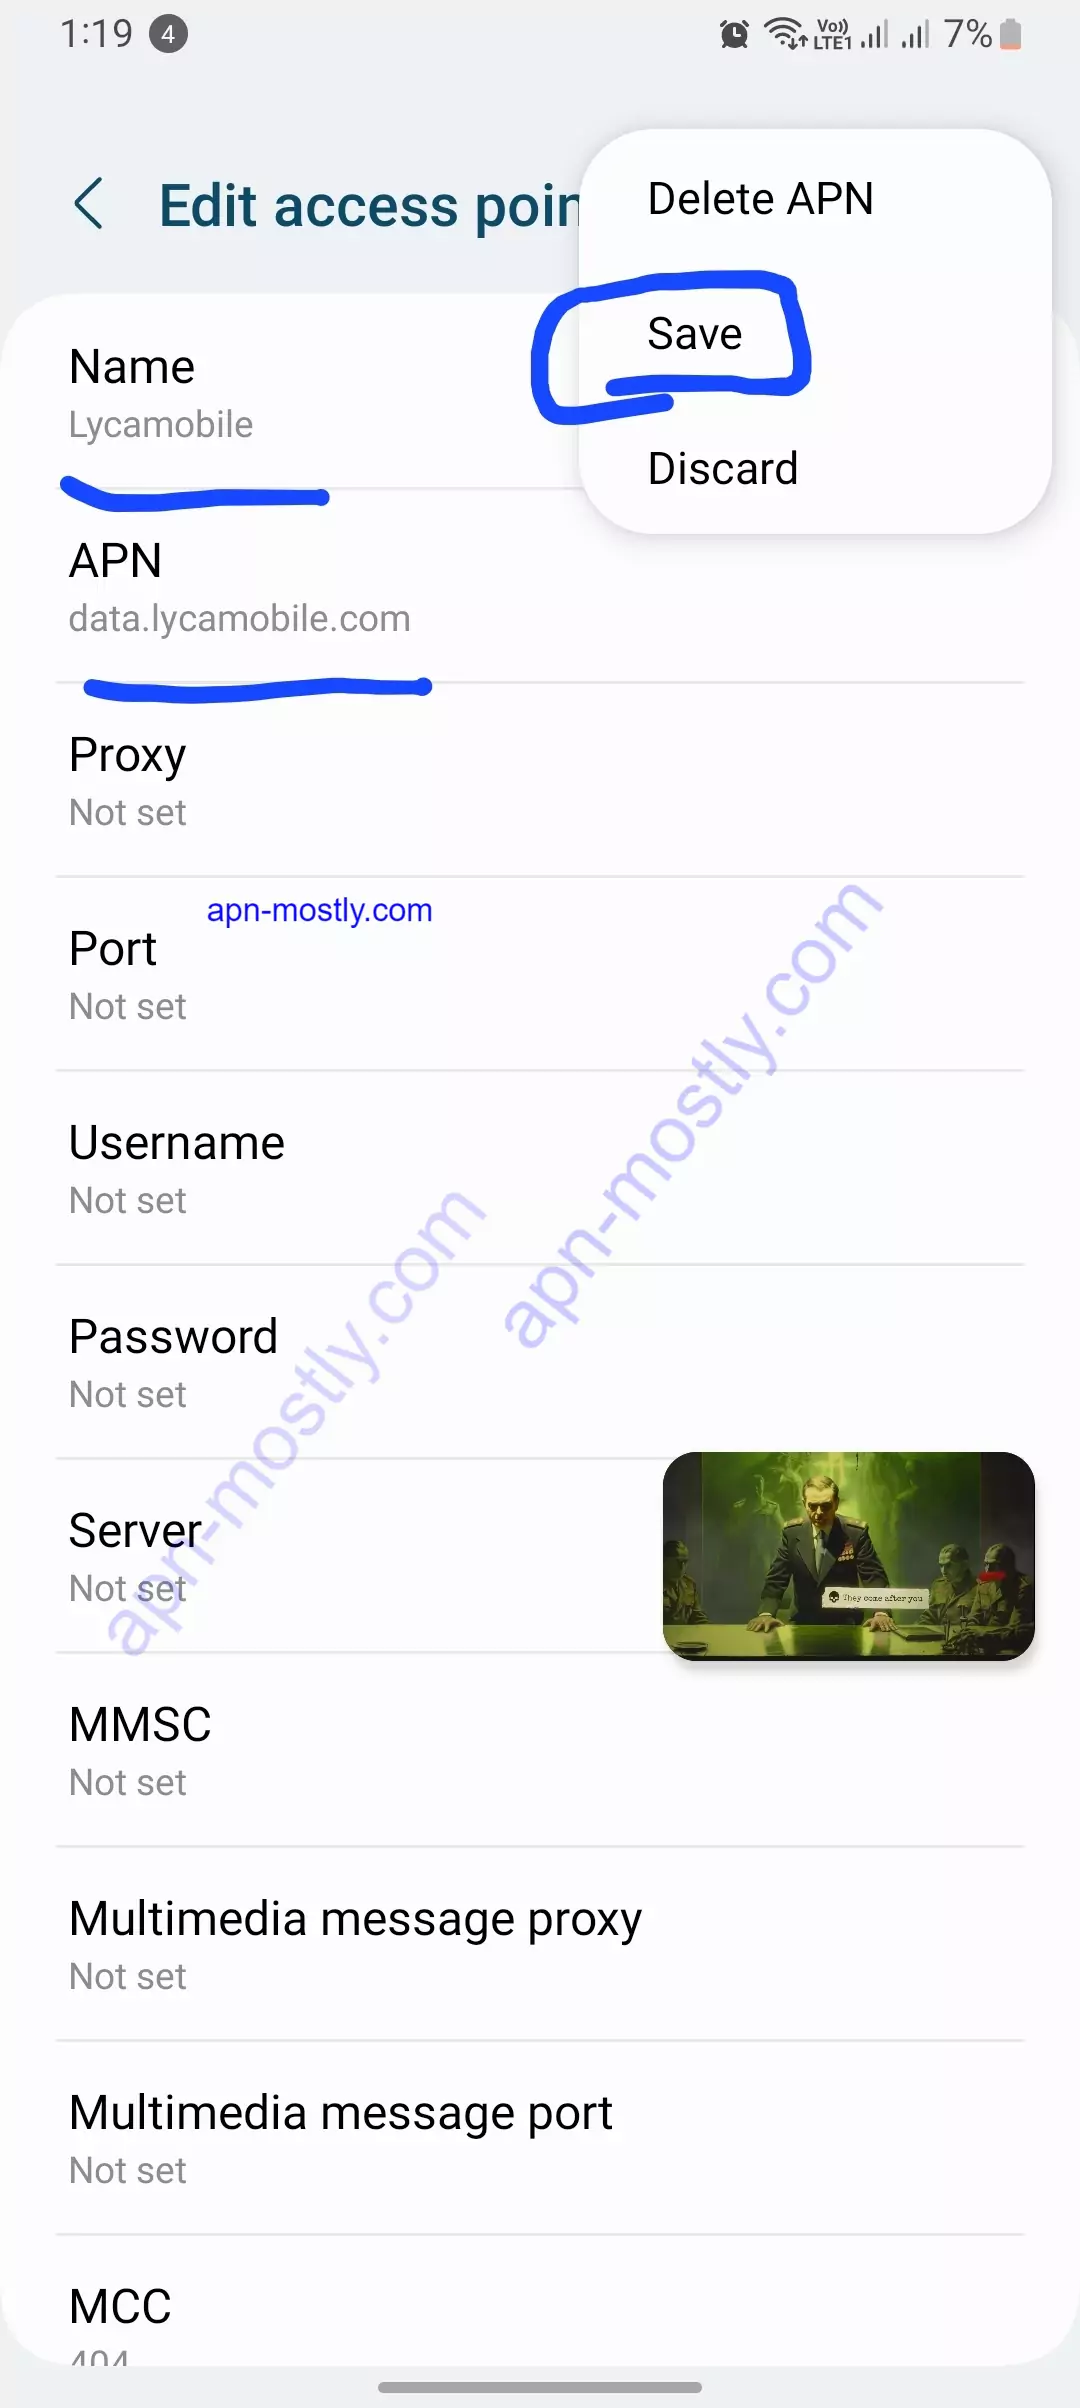
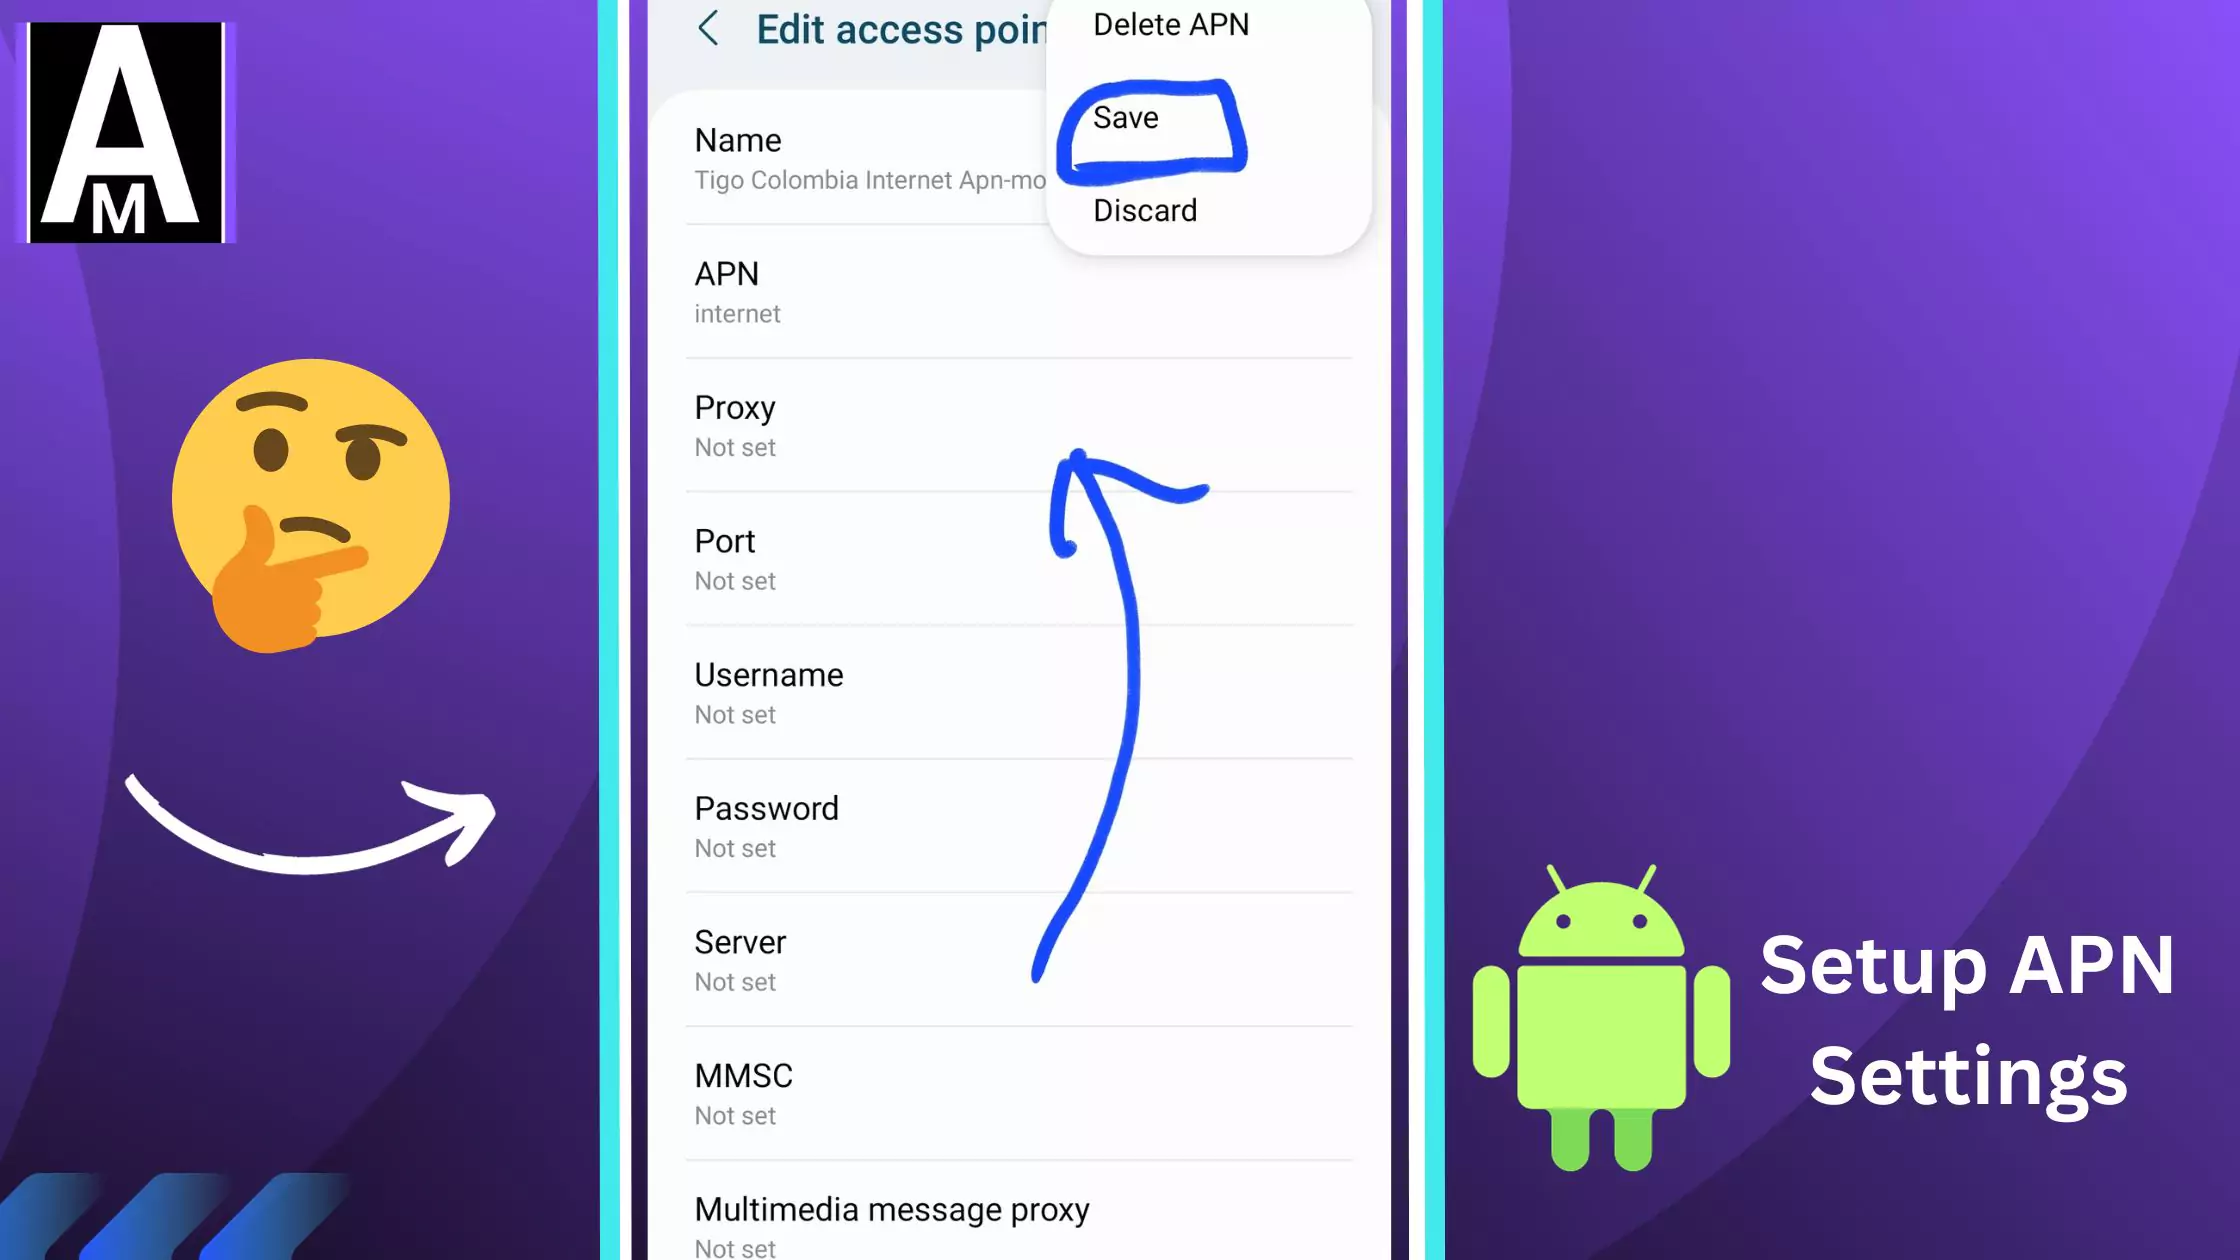
3. Saving and Activating the APN
- Once you’ve entered all the APN settings, tap the Menu button and select Save.
- The newly created APN profile should appear in the APN list.
- Select the newly created APN profile and tap the radio button next to it to make it active.
- Restart your Android device to apply the new APN settings.
Troubleshooting Common APN Issues
- If you’re still struggling to connect to the internet after following these steps, consider the following troubleshooting tips:
- Firstly, verify your APN settings. Double-check that you’ve entered the correct APN settings for your mobile carrier. I recommend using the information provided by your carrier’s website or customer support.
- Next, check your SIM card. Ensure that your SIM card is properly inserted and activated. Take a moment to inspect it for any damage or physical issues.
- Make sure to enable cellular data in your device’s settings. Go to Wireless & Networks or Network & Internet, and in my experience, ensure that the Mobile data toggle is turned on.
- If the issue persists, a simple restart can sometimes do wonders. Turn off your device completely and then turn it back on.
- In my case, if none of these steps work, it’s crucial to contact your mobile carrier’s customer support for further assistance. They can help you identify any underlying problems and provide accurate APN settings based on your specific situation. Remember, troubleshooting connectivity issues can be unique to each individual, so it’s important to reach out for personalized support.
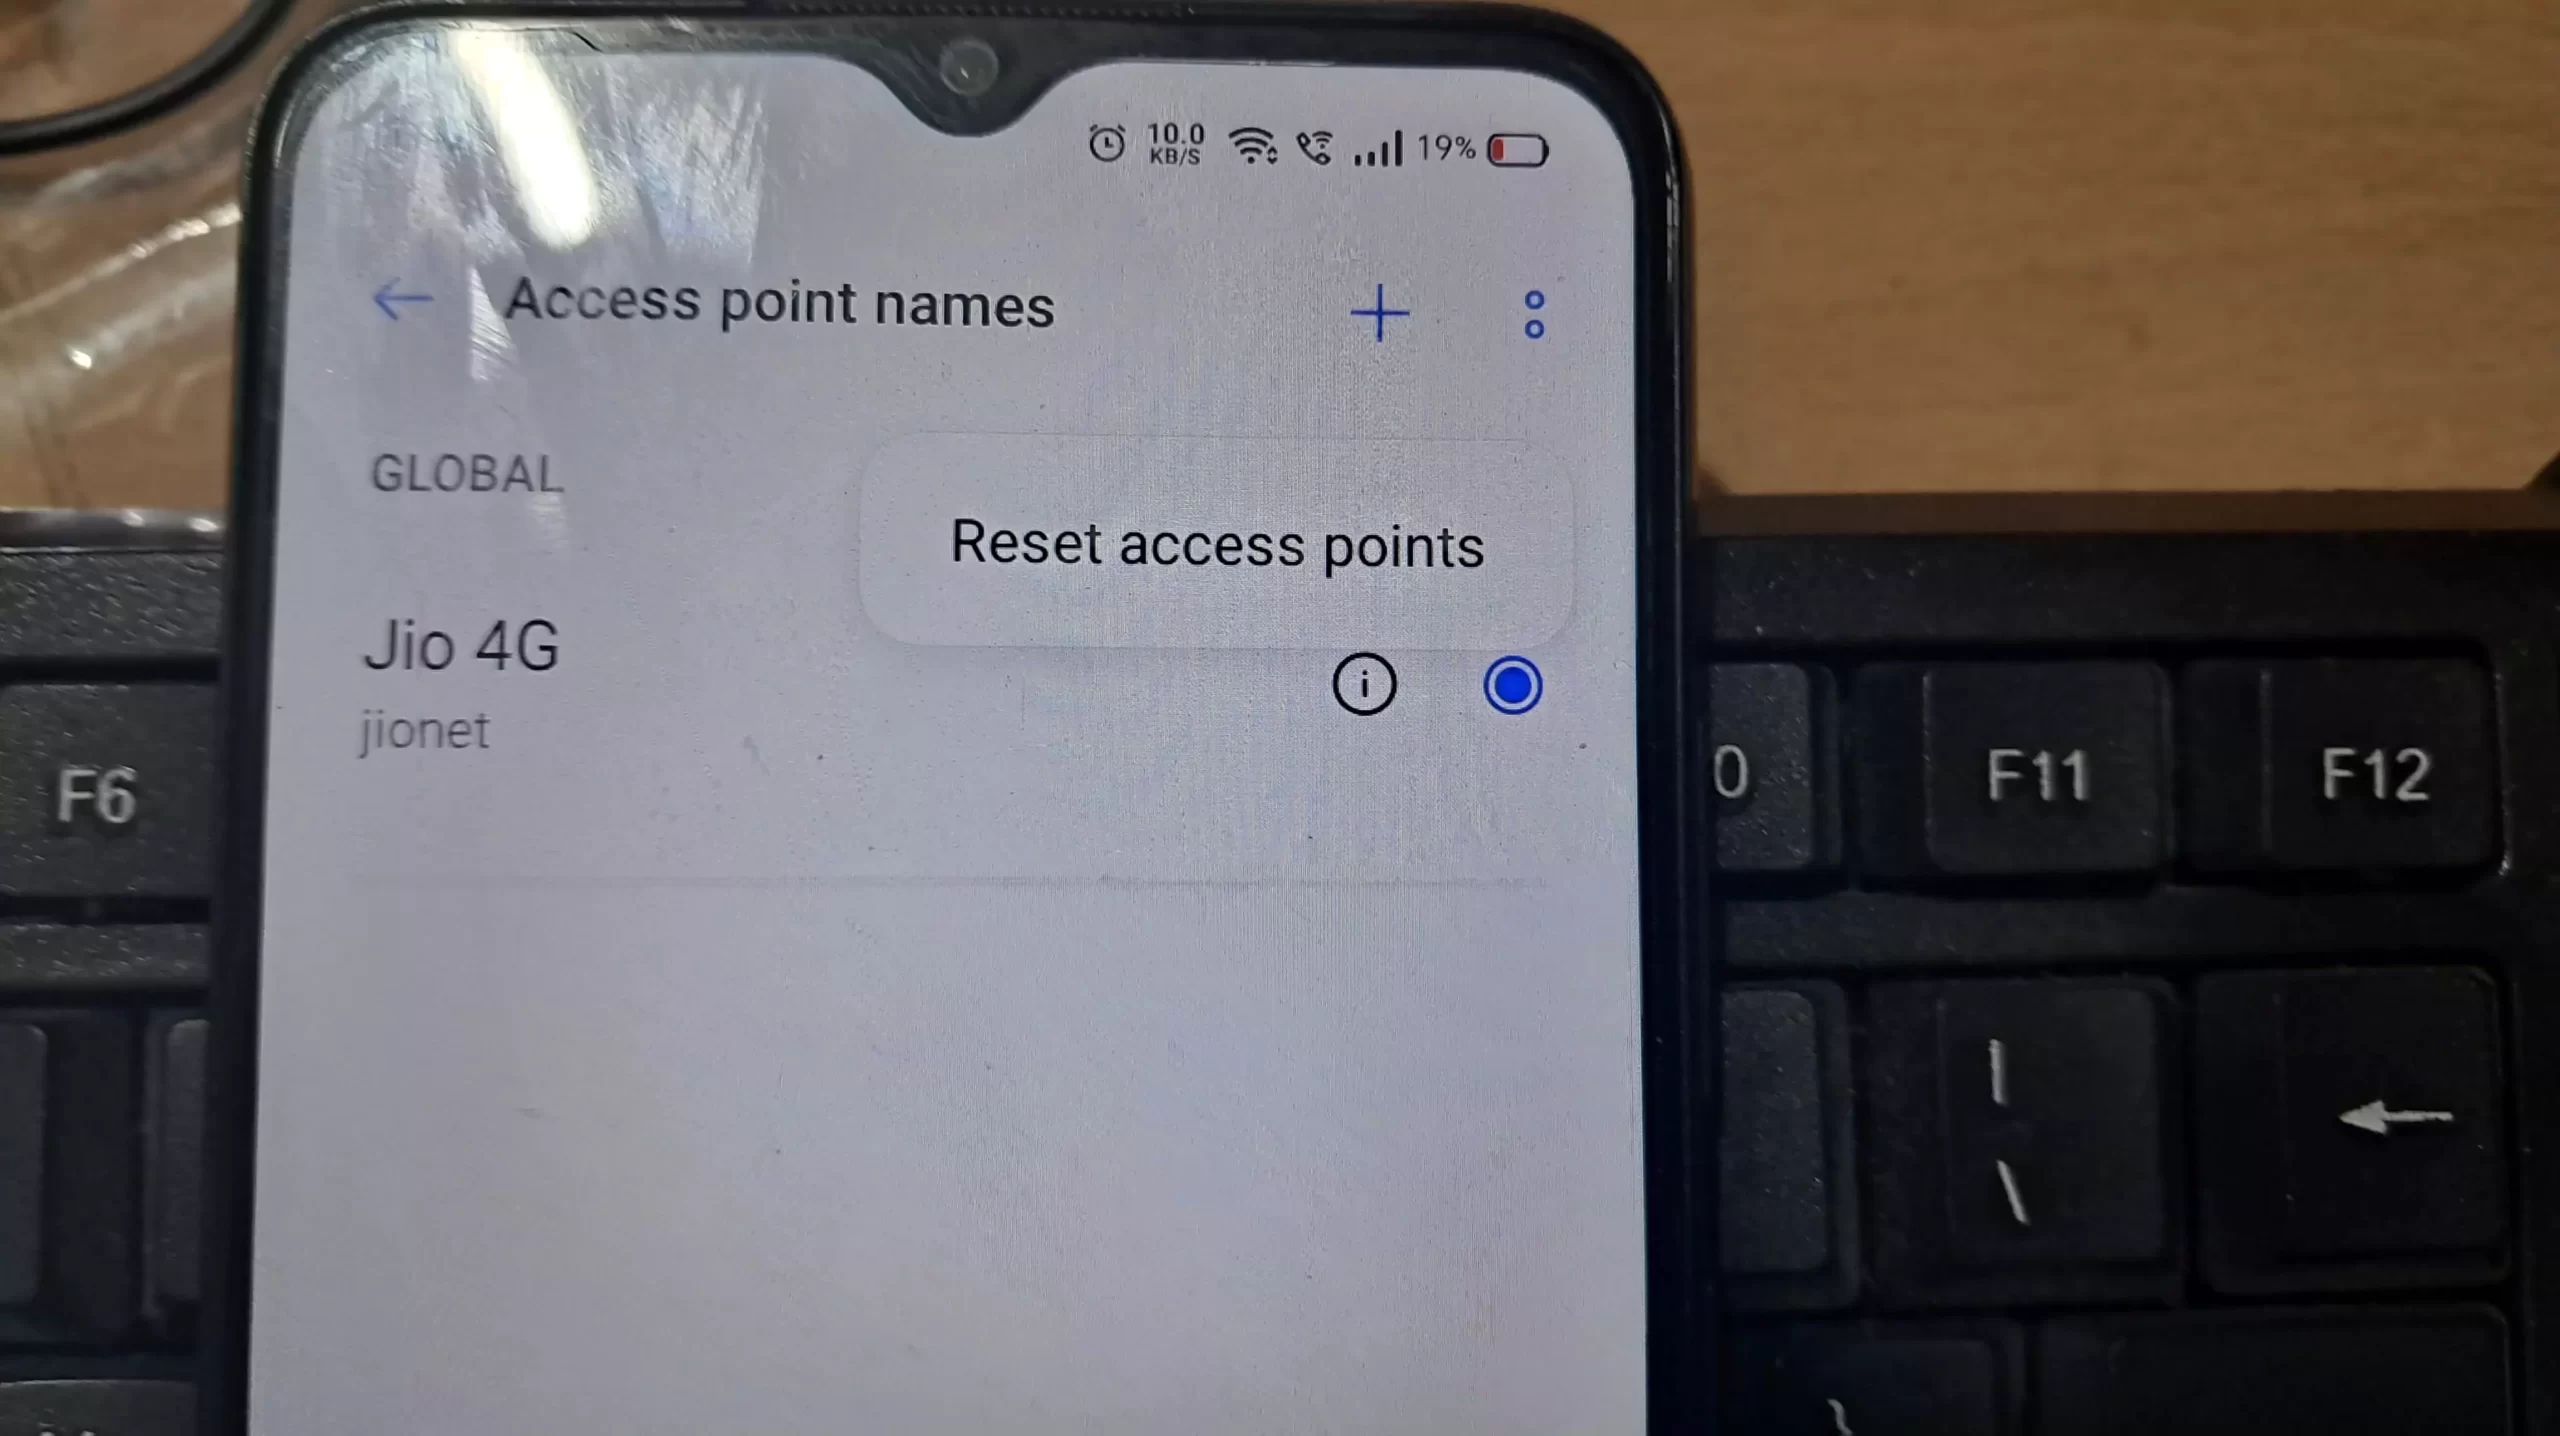
- Resetting: Probably you have setup the APN in an inappropriate man so you have to re-go through all the steps that I told you about I will check all the screenshots of how I did and follow the same thing if it does not work out for you the simple thing is simply reset your network settings or simply reset your access point name configuration by reading this.
Additional Tips and Considerations
- Maintaining Multiple APNs can be beneficial, especially if you travel or use various mobile networks. I suggest having multiple APN profiles saved for different carriers or regions to ensure seamless connectivity in different situations.
- If you come across persistent connectivity issues, resetting the APN settings to their default values is a viable option. In my experience, this can sometimes resolve any corrupted settings that might be causing the problem.
- For more specific instructions and troubleshooting steps related to APN configuration, I recommend consulting your device’s user manual. It often provides valuable information tailored to your device, helping you navigate APN settings and address connectivity issues more effectively.
Quick Summary of Setup APN on android
To setup an Access Point Name (APN) on your Android device, begin by opening the Settings app. Navigate to Wireless & Networks or Network & Internet, then select Mobile Networks. Look for the Access Point Names (APN) option, which might be under More Networks or a similar settings menu. To add a new APN, find the values from APN-Mostly.com or your carrier provider. Tap the Add or Plus (+) icon, name the new APN profile, and enter the APN settings provided by your carrier. These typically include the APN name, APN value, proxy, port, MMSC, MMS proxy, MMS port, MCC, MNC, authentication type, bearer, MVNO type, MVNO value, protocol, roaming protocol, MVPN, IPv4/IPv6 address, network operator, authentication via SIM, and carrier aggregation. After entering the details, save the APN, activate it, and restart your device to apply the new settings.
Conclusion
Correct APN settings are crucial for seamless mobile data connectivity on Android devices. By following the provided guide, you can easily set up or modify APN settings and ensure uninterrupted internet access. If you encounter any difficulties, don’t hesitate to contact your mobile carrier for assistance.
So, that is it for today’s blog post. In today’s blog, I have dedicatedly shown you how you can setup APN settings, whether it is from T-Mobile, Verizon, or any carrier. Because what is more important is setting up the APN in the right manner after having the right settings. This is what we did with all the screenshots and videos, which will help you more. I hope you found the information helpful. If it doesn’t, definitely let us know in the comments section below, or if you have any doubts, feel free to contact us.