This is the practical and proper guide on finding the APN settings on any Android device. And literally any. Oftentimes, your mobile carrier can cause slow internet or data network is not working, then most people try to access APN, so this is how you can do it.
Locating APN Settings on Android
The general steps to locate APN settings on most Android devices are as follows:
- Open the Settings app on your Android phone.
- Navigate to the Network & internet (or Wireless & networks) section.
- Look for Mobile network (or SIM cards) and tap on it.
Note: The wording might differ slightly on some phone models, but the overall path should be similar.

Once you’re in the Mobile network menu, you should find an option related to Access Point Names (APN). This could be labeled directly as “APN” or under a submenu like “Advanced” or “Network settings.”
Finding APN Settings on Specific Phone Models (Optional)
Let’s explore how to find the APN settings on various Android smartphones like Samsung, Xiaomi/Redmi, Motorola, OnePlus, Huawei, Oppo, Vivo, LG, Google Pixel devices, or any Android smartphone.
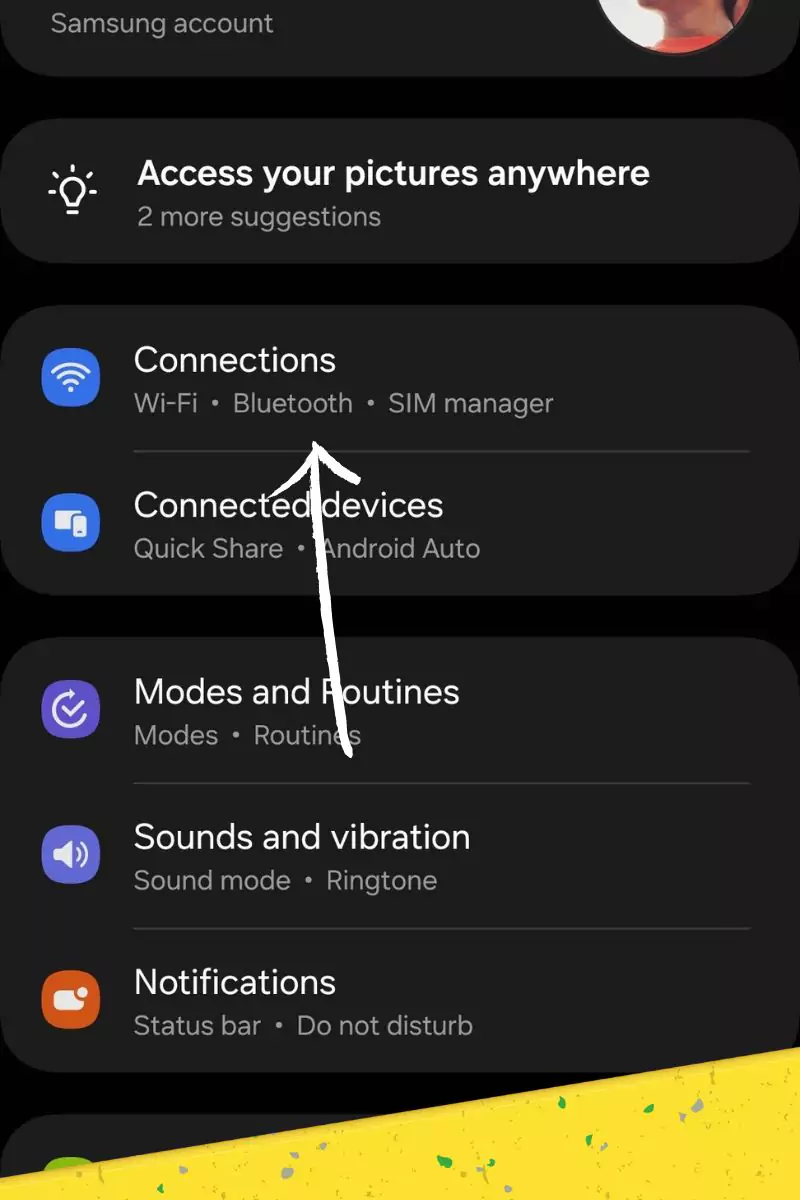
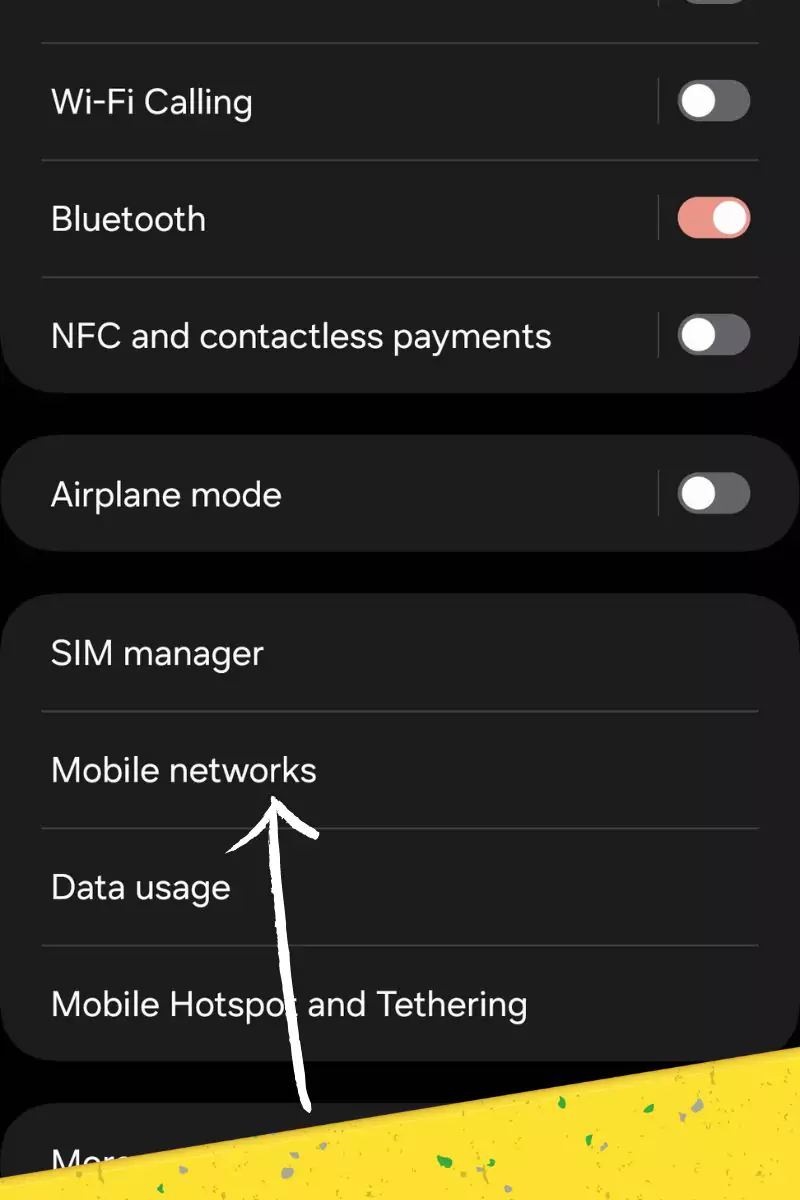
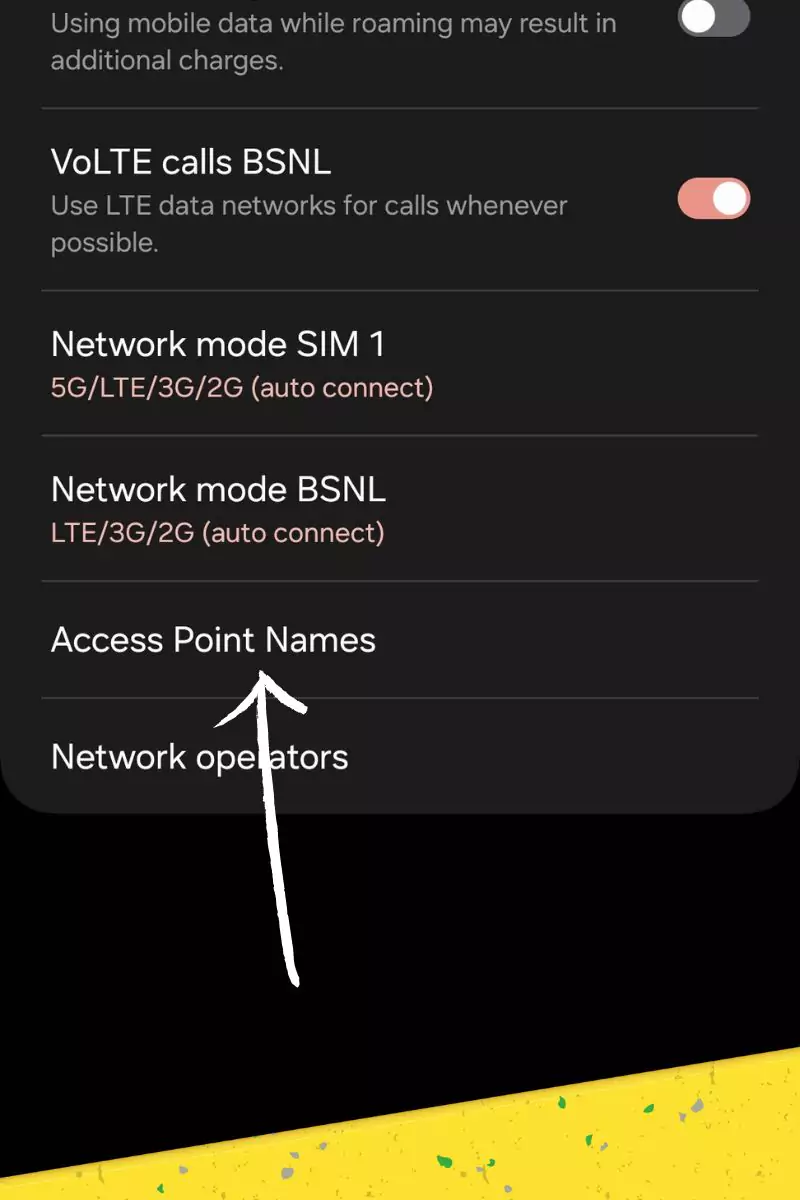
- Samsung: On your Samsung device, go to “Settings.” Then, tap on Connections > Mobile networks > Access Point Names
- Xiaomi/Redmi: Open “Settings” on your Xiaomi/Redmi device. Scroll down and tap on “SIM cards & mobile networks.” Next, select the SIM card you want to configure, then tap on “Access point names.”
- Motorola: Navigate to “Settings” on your Motorola device. Scroll down and tap on “Network & Internet” or “Connections.” Then, select “Mobile network” followed by “Advanced” or “More” and finally “Access Point Names.”
- OnePlus: Go to “Settings” on your OnePlus device. Scroll down and tap on “Wi-Fi & Internet” or “Connections.” Then, select “SIM & network” or “Mobile network” and finally “Access Point Names.”
- Huawei: Open “Settings” on your Huawei device. Tap on “Wireless & networks” or “Connections.” Then, select “Mobile network” followed by “Access Point Names.”
- Oppo: Navigate to “Settings” on your Oppo device. Tap on “Dual SIM & Cellular Network” or “Connections & Network.” Then, select “SIM card & mobile data” and finally “Access Point Names.”
- Vivo: Go to “Settings” on your Vivo device. Tap on “More settings” or “Connections & Network.” Then, select “Mobile networks” followed by “Access Point Names.”
- LG: Open “Settings” on your LG device. Scroll down and tap on “Network & Internet” or “Connections.” Then, select “Mobile network” followed by “Access Point Names.”
- Google Pixel: Settings > Network & internet > Mobile network > Advanced > Access Point Names.
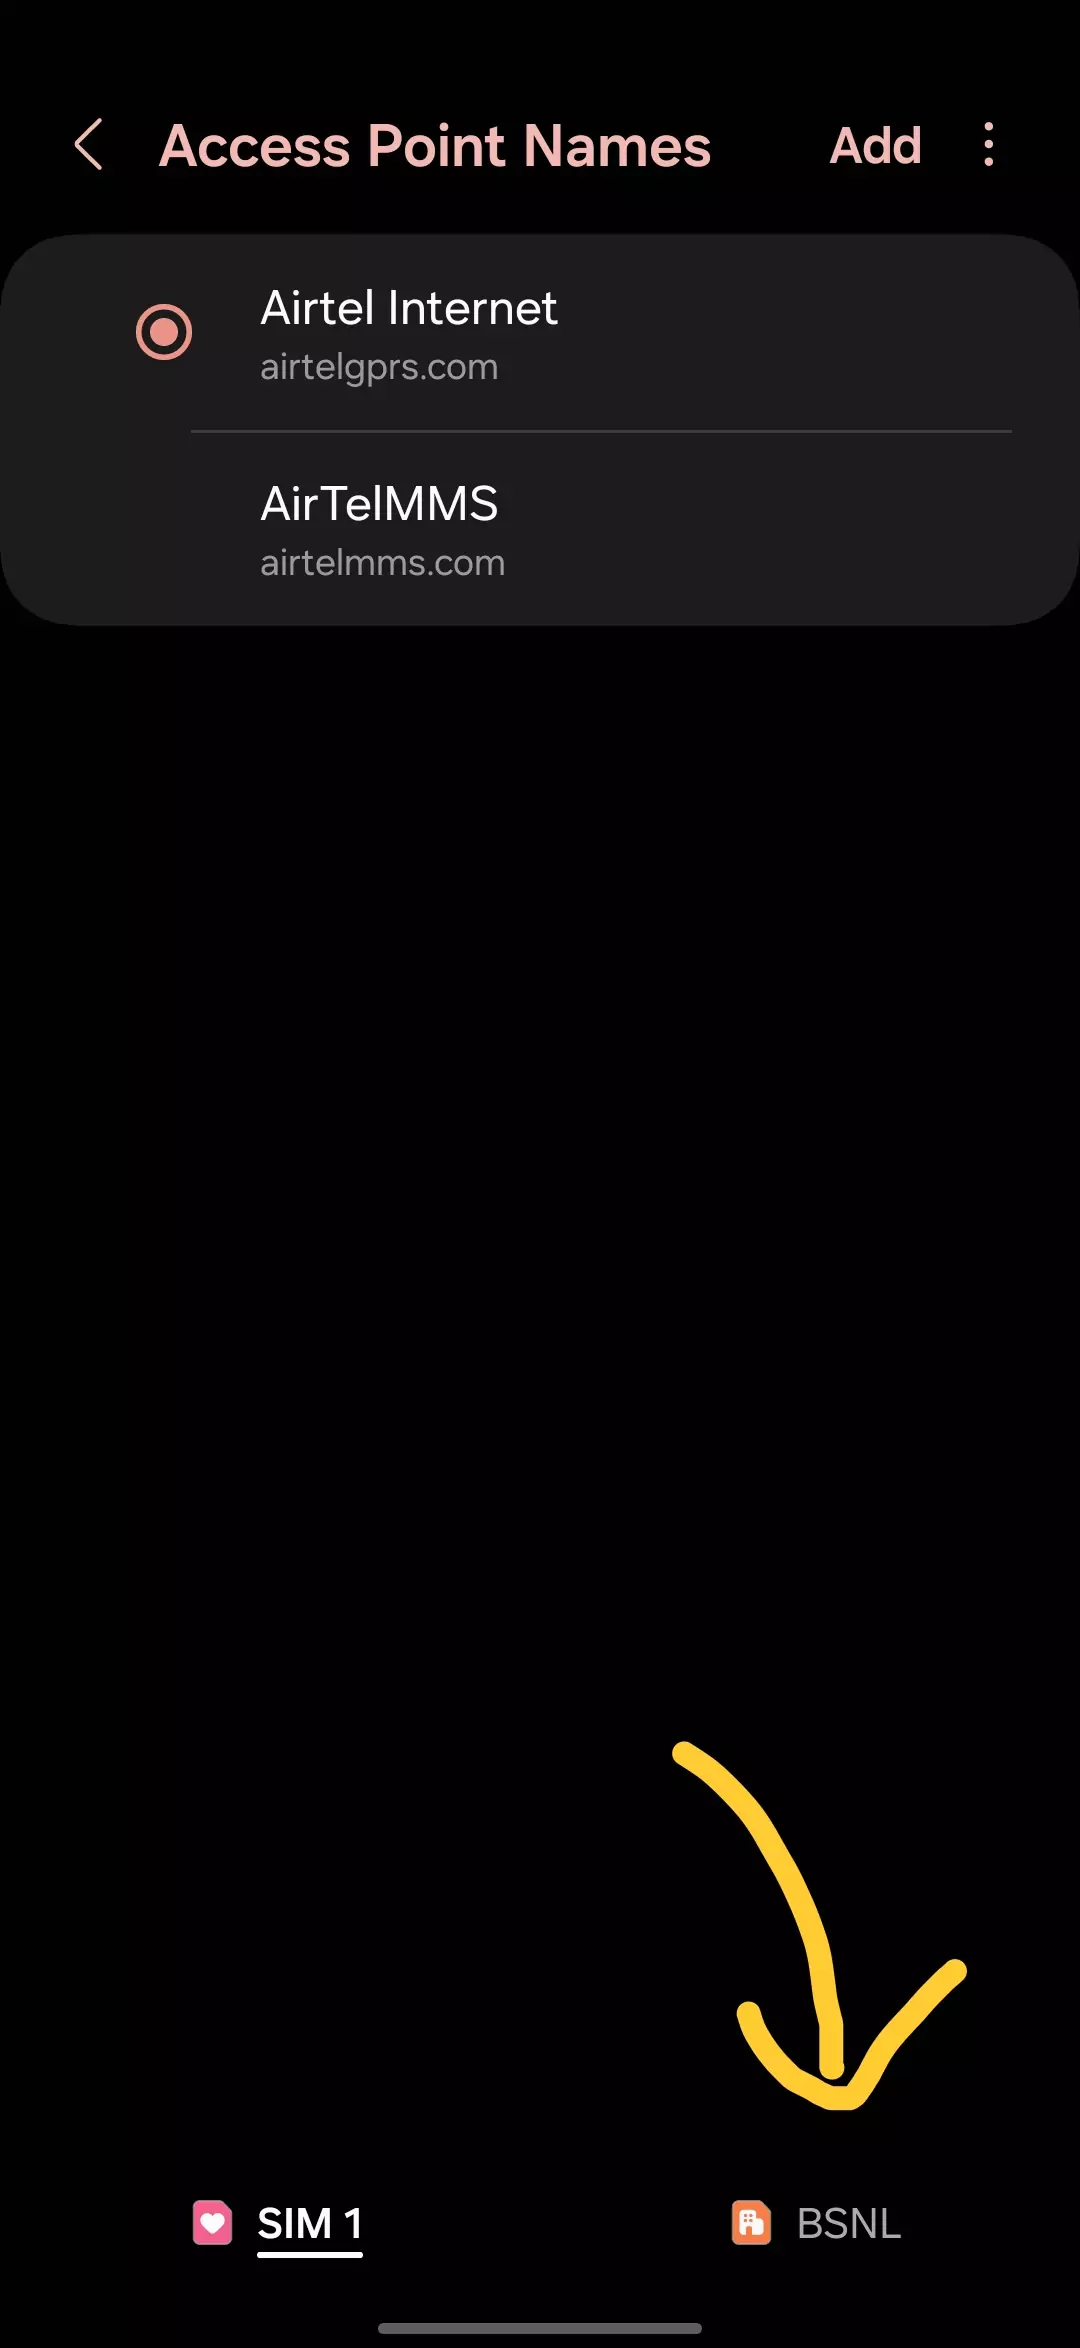
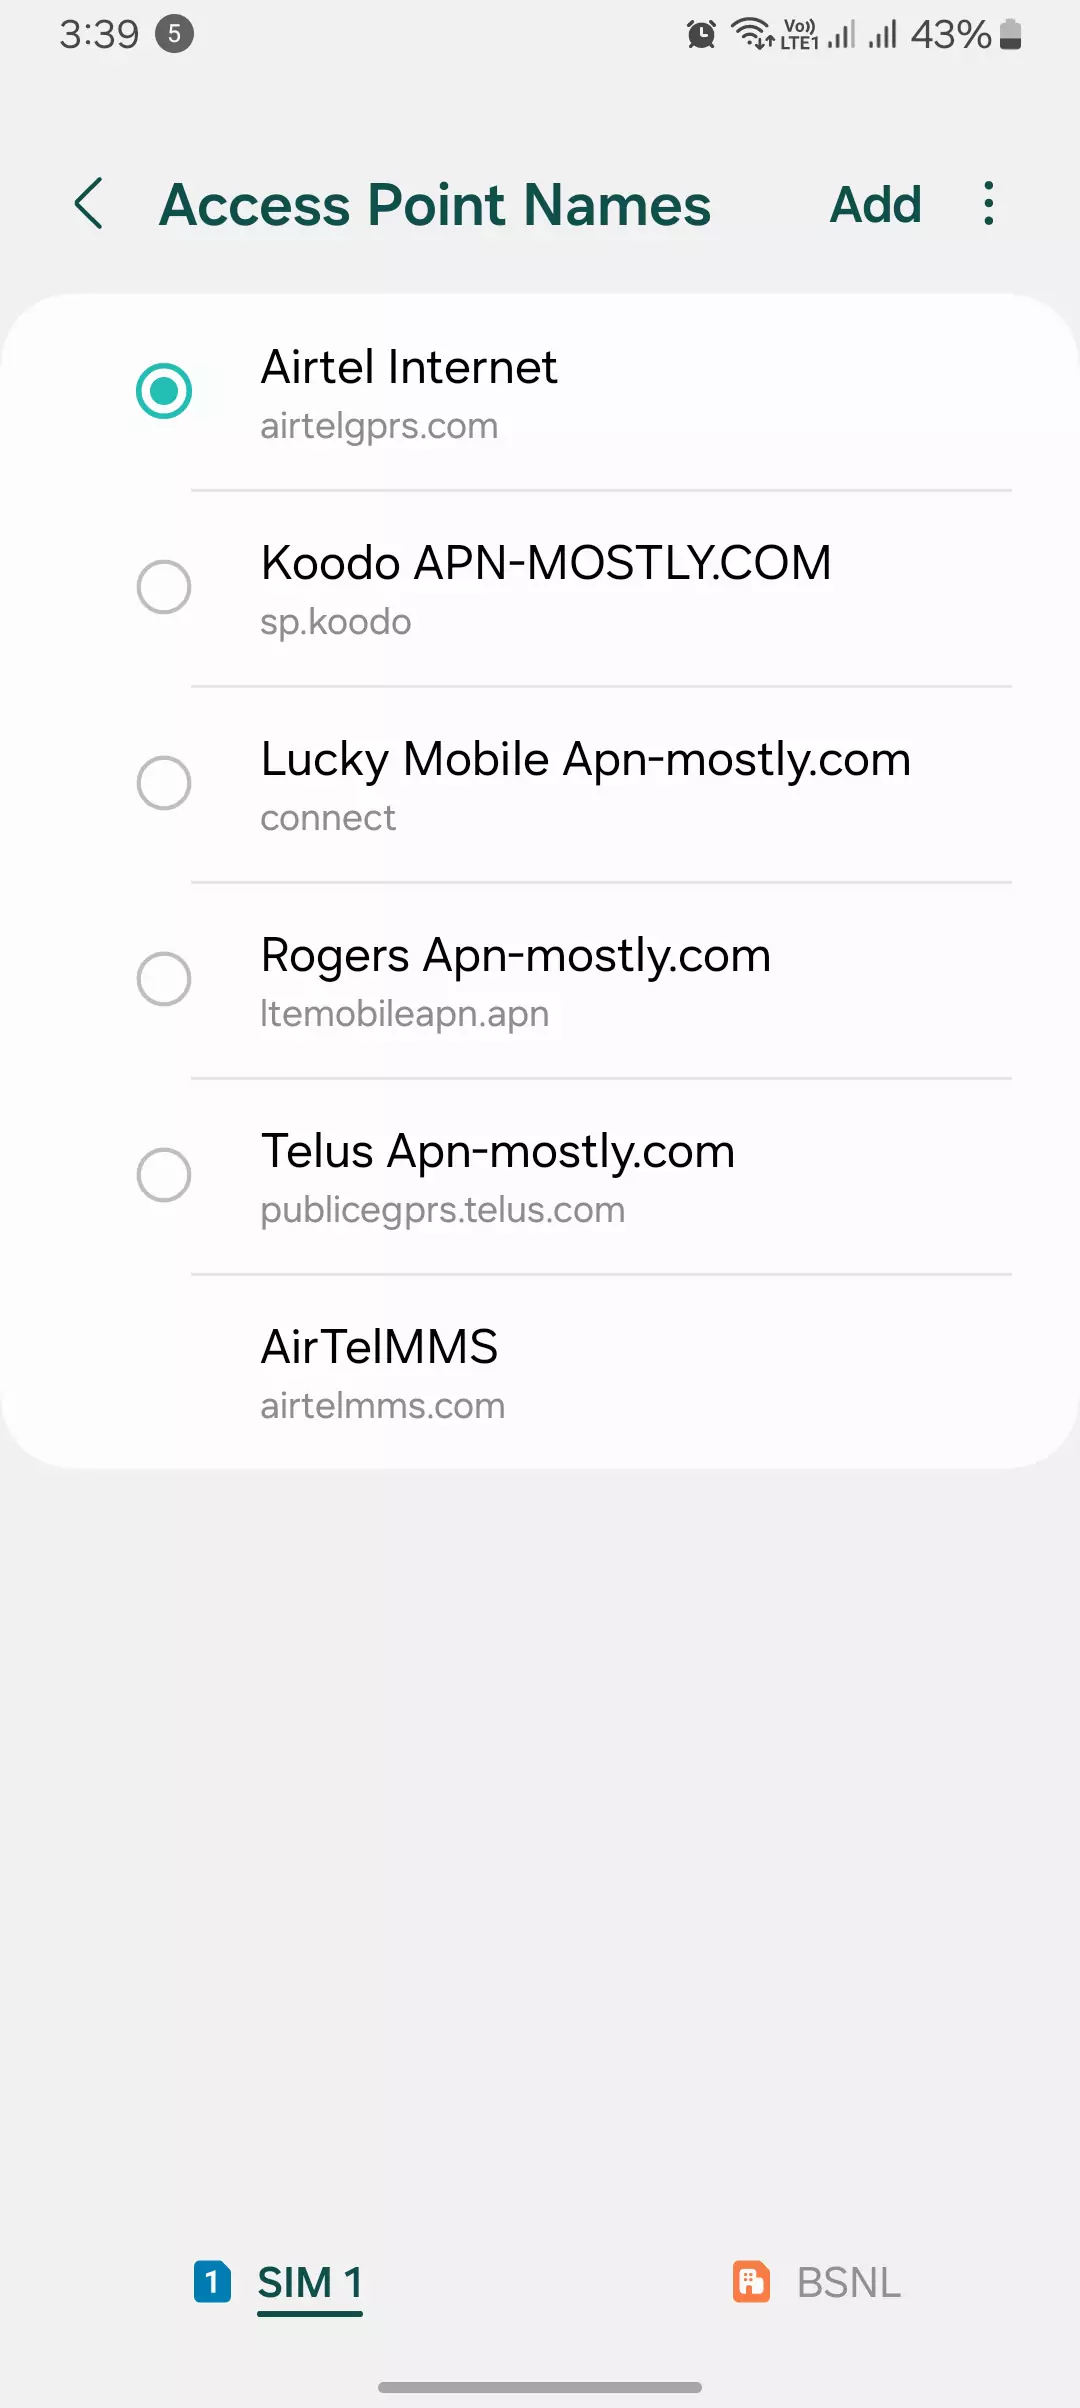
Here’s how you can manage the APN settings for each SIM card


- Open the Settings app on your Android phone.
- Navigate to the Network & internet (or Wireless & networks) section.
- Look for Mobile network (or SIM cards) and tap on it.
- Here you will find APN, tap on it.
- Look for Bottom Navigation Bar: Check if there’s a navigation bar at the bottom of the Settings screen. This bar might display options for different sections or functionalities.
- Second SIM Card Option: If the navigation bar exists, see if there’s a dedicated option for your second SIM card. It might be labeled with the SIM card name or number (e.g., SIM 2).
- Bottom Bar for SIM Cards: Some Android 12+ phones have a special section at the bottom of the screen specifically for managing SIM cards. This makes it easy to find and use.
- Named SIM Cards: If your phone supports it, this section might even show the names of your SIM cards. This makes it simple to tell them apart and quickly access their settings.
- Quick Access to APN Settings: You can tap or slide on the named SIM card in the bottom bar. This gives you a fast way to get to the menu where you can adjust its APN settings.
Alternatives?
- Uncovering Hidden Menus For some older Android devices or those with heavily customized interfaces, the APN settings might be tucked away within diagnostic or engineering menus. Accessing these hidden menus typically involves specific key combinations during the device’s boot-up process. However, as your trusty teacher, I must caution you that tinkering with these advanced menus can be risky if you’re not an experienced user, as it may potentially lead to unintended consequences.
- Carrier-Provided Apps In an effort to streamline the user experience, certain mobile carriers offer dedicated apps that can manage APN settings and troubleshoot connectivity issues. These carrier-specific apps can be a convenient alternative to manually configuring the settings within your phone’s menus.
- Consulting the SIM Card In rare cases, the APN details might be printed directly on the SIM card itself. While this might seem like an unconventional approach, it can be a helpful resource if you’re having difficulty locating the necessary settings on your device.
Remember, while these alternative methods can be useful in specific scenarios, it’s essential to approach them with caution and seek guidance when needed. As your trustworthy teacher, my primary goal is to ensure you have a comprehensive understanding of APN management
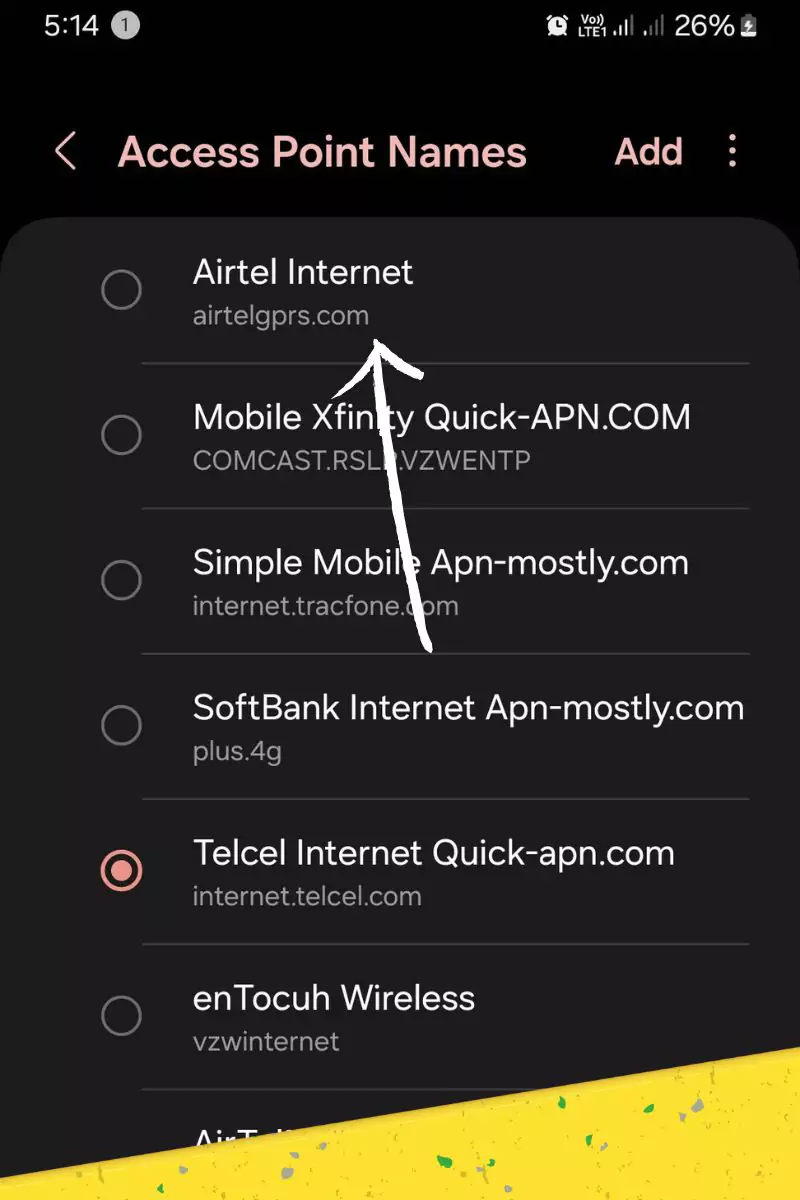
Viewing Current APN Settings
Upon reaching the APN settings menu, you’ll see a list of existing APN configurations. Each APN typically displays information like:
- Name: A user-friendly name for the APN configuration. It could be anything, I have configured multiple apns, as per their speciality. Suppose if there’s an APN for gaming, it is named as “Gaming” and if there’s something for data saving then I have named it “data saving.”
- APN: The actual access point name provided by your mobile carrier.
- MMSC: Multimedia Messaging Service Center, used for sending and receiving MMS messages.
- Other settings: Depending on your carrier, there might be additional settings like Username, Password, etc.
Understanding APN Settings
Imagine your phone as a student, and the mobile carrier’s network as a school. Just like a student needs to go through the school’s gate to enter the premises, your phone needs a “gateway” to access the mobile carrier’s internet network. This gateway is what we call the Access Point Name or APN.
When you first set up your Android phone and insert your SIM card, it automatically finds and configures the APN settings, just like a student being given the directions to the school’s gate. However, sometimes there might be situations where your phone needs a little extra help in finding the right gate or APN settings.
Additional Tips
- You can edit existing APN settings or create new ones if needed. However, it’s crucial to obtain the correct APN details from your mobile carrier to ensure proper internet connectivity. Incorrect settings can lead to issues accessing mobile data.
- If you’re unsure about the specific APN settings for your carrier, contact their customer support for assistance.
Conclusion
Think of your phone as a classroom with two desks, each representing a SIM card. Just like students sitting at different desks might have different needs or preferences, each SIM card in your phone might need its own special instructions (APN settings) to connect to the internet properly. Finding APN settings on Android is a straightforward process. By following the general steps and considering the variations for specific phone models, you should be able to locate and manage your APN configurations. Remember, using the correct APN details provided by your carrier is essential for smooth mobile internet access on your Android phone.
I hope you find the information helpful. If it does, let us know in the comment section below, or you can simply upvote from the comment section. It will help us and other users to know whether we did a great job or not. Thanks for visiting, have a nice day!