
Have you ever wondered why your iPhone suddenly stops connecting to the internet, even with an active data plan?
It could be because your Access Point Name (APN) settings are incorrectly configured. Don’t worry, though – configuring APN settings is easy, and in this guide, we’ll show you how to do it specifically for the O2 network on your iPhone.
First things first – what exactly is an APN? An APN is a gateway between your iPhone and the mobile network you are using.
It is responsible for setting up the internet connection, transmitting data, and authenticating your device on the network. Think of it as a key that unlocks the doors to the internet for your iPhone.
How do you find the O2 APN settings for your iPhone? The quickest way is to visit the O2 website or contact their customer support team. Once you have the correct settings, it’s time to configure them on your iPhone.
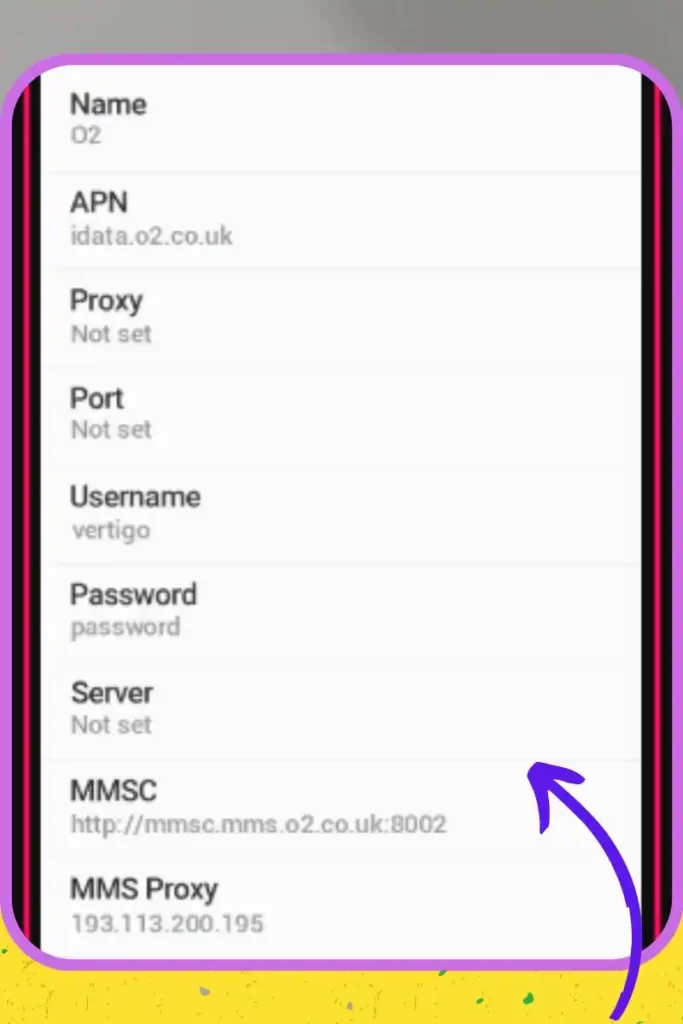
O2 APN Settings For iPhones
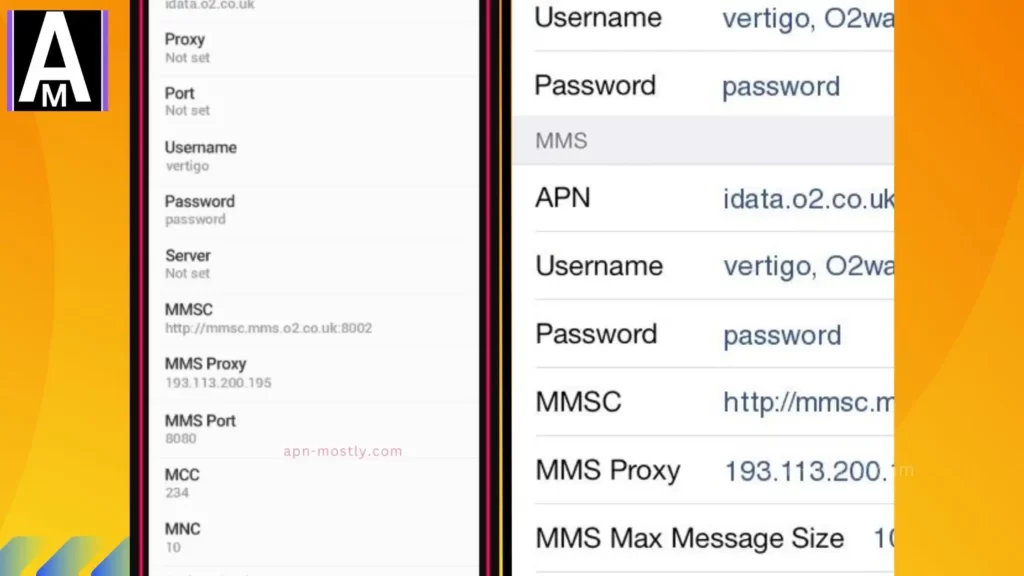
| Setting | Value |
| Name | O2 Internet |
| APN | mobile.o2.co.uk for Pay Monthly |
| wap.o2.co.uk for Pay As You Go | |
| Proxy | Not Required |
| Port | Not Required |
| Username | o2web |
| Password | password |
| Server | Not Required |
| MMSC | http://mmsc.mms.o2.co.uk:8002 |
| MMS Proxy | 82.132.254.1 |
| MMS Port | 8080 |
| MCC | 234 |
| MNC | 10 |
| Authentication | Not Required or use default value shown |
Please note that these settings are specific to O2 UK. If you are using O2 in a different country, the APN and MMS settings may differ. It’s always best to check with your network provider or consult their website for the correct settings.
- APN Protocol & APN Roaming Protocol (Ultimate Guide) 101
- Jio APN Settings: A Way for Faster Internet on Your Mobile Phone
Editing O2 APN Settings
As your trusty teacher, I understand that optimizing your mobile data experience is crucial. One way to achieve this with O2 on your Android device is by editing the Access Point Name (APN) settings. Let me walk you through the process, step-by-step:
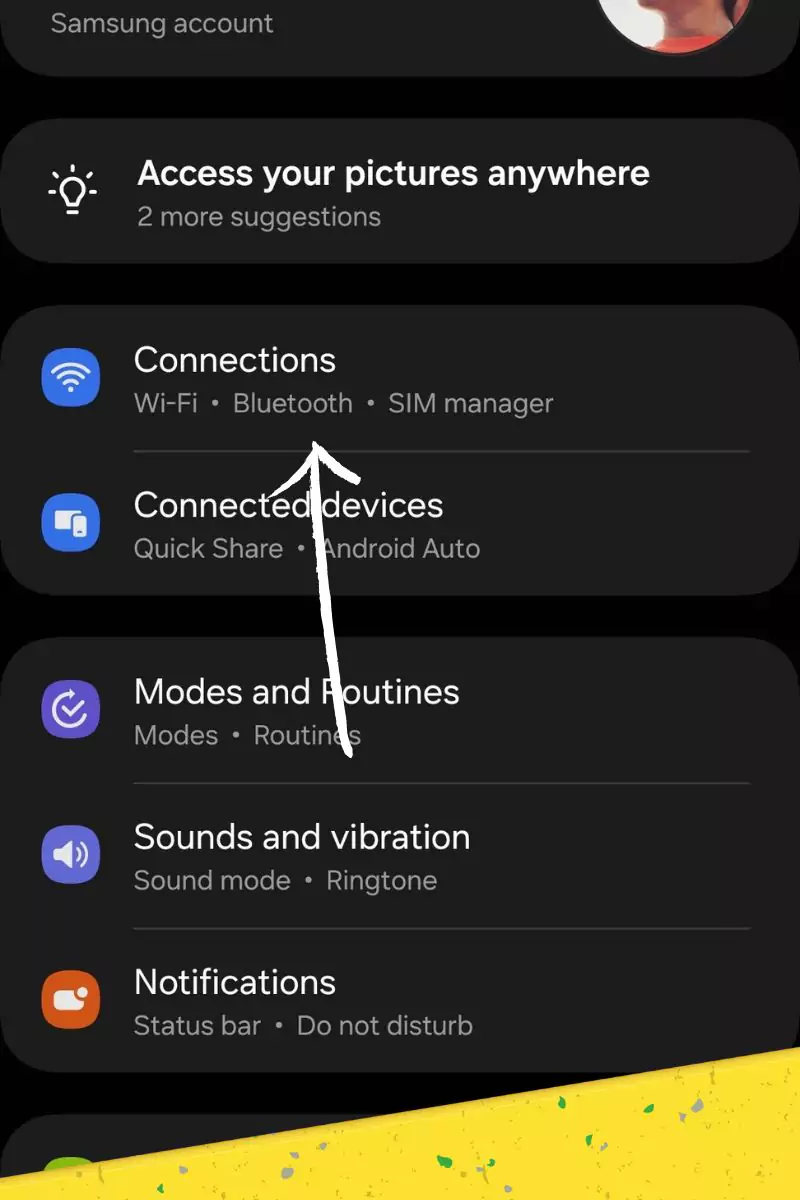
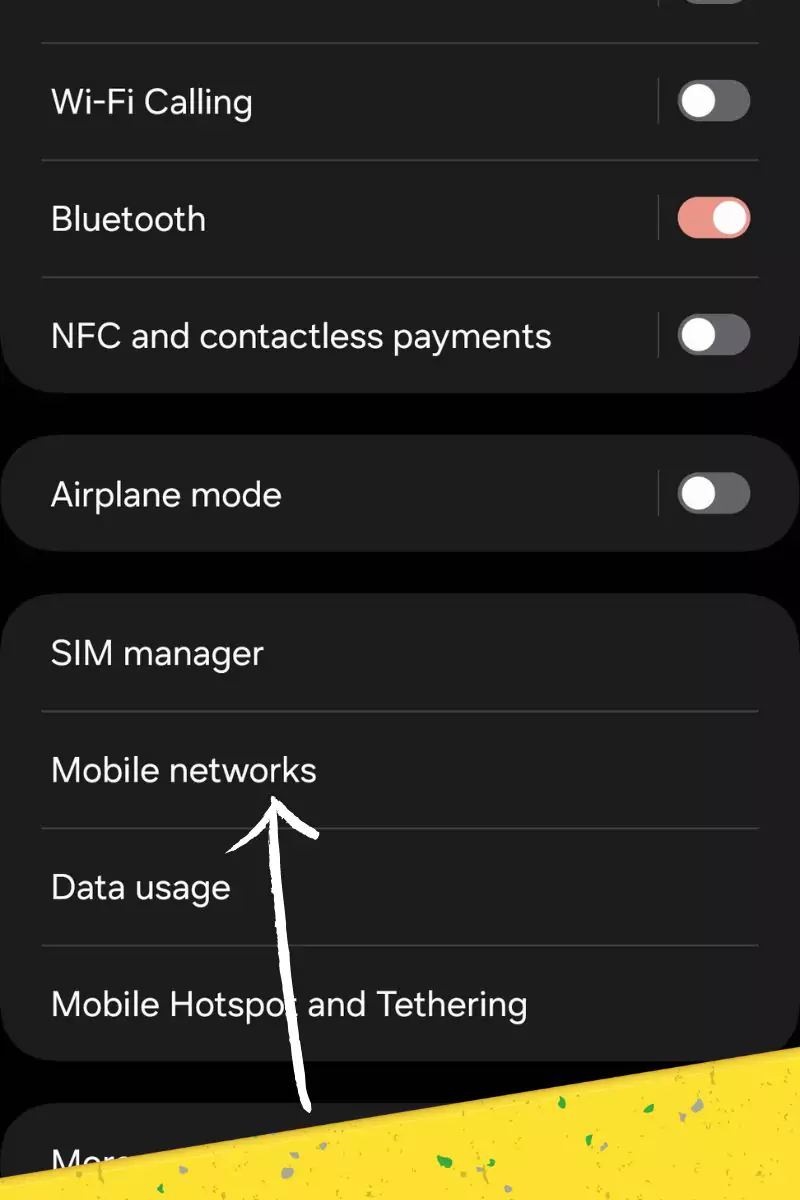
- Access Network Settings Navigate to your device’s “Wireless & Networks” or “Network & Internet” section within the settings menu.
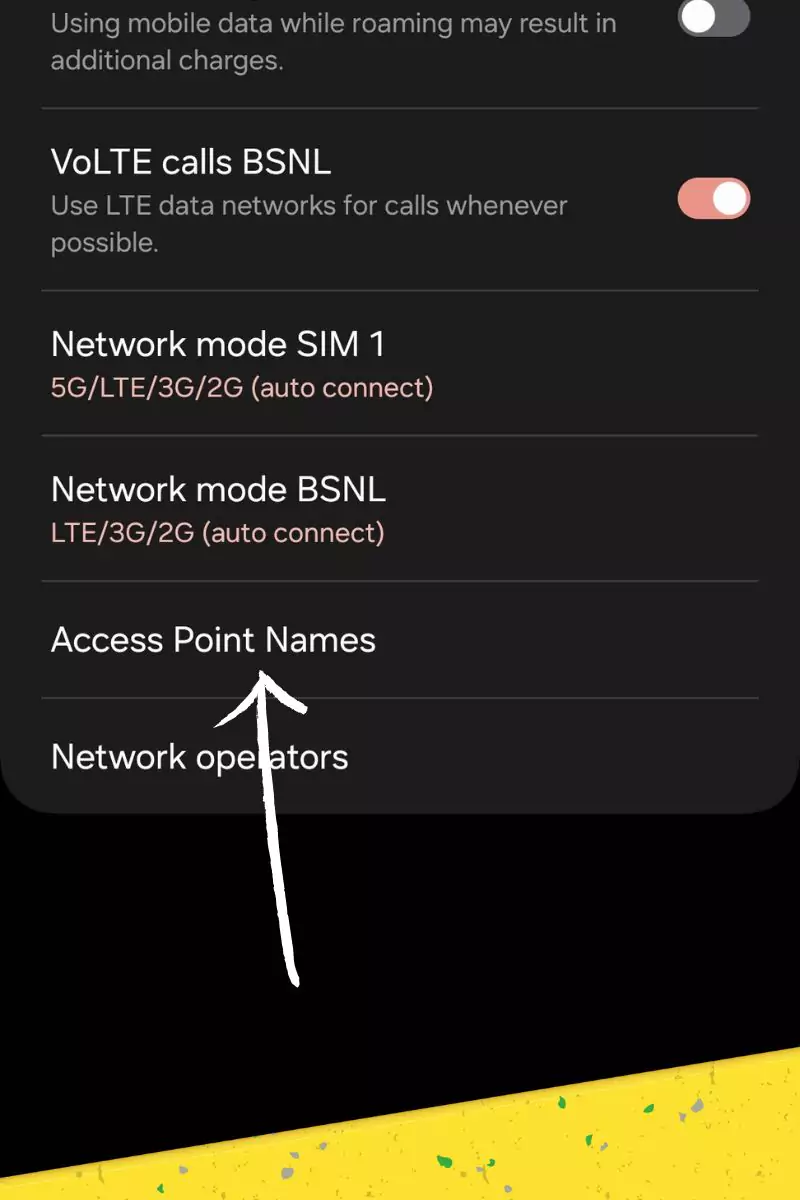
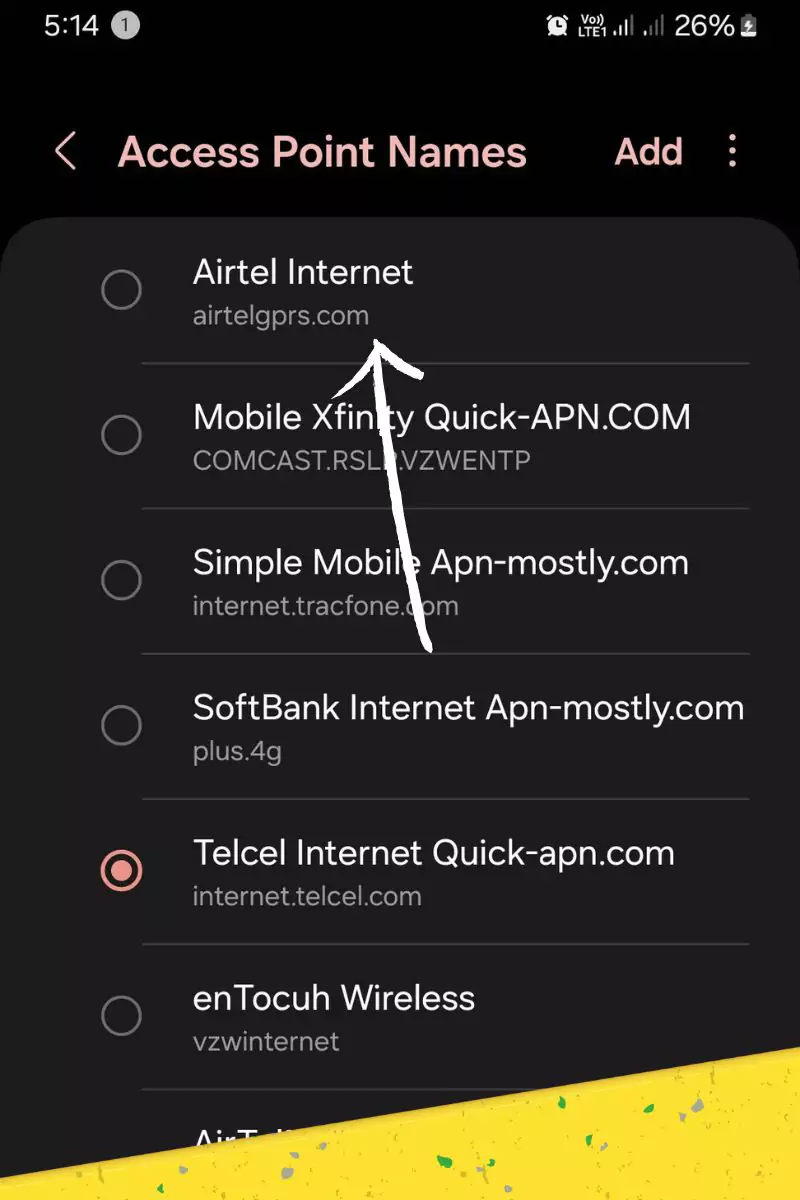
- Locate APN Management Within this menu, find the option labeled “Access Point Names” or simply “APN” and tap on it.
- Select O2 Network In the list of APN entries, identify and select the one corresponding to “O2” – this is the network provider we’ll be modifying.
- Edit APN Details Look for an option to “Edit,” “Modify,” or “Change” the existing O2 APN settings, often represented by an “i” icon, three vertical dots, or an overflow menu.
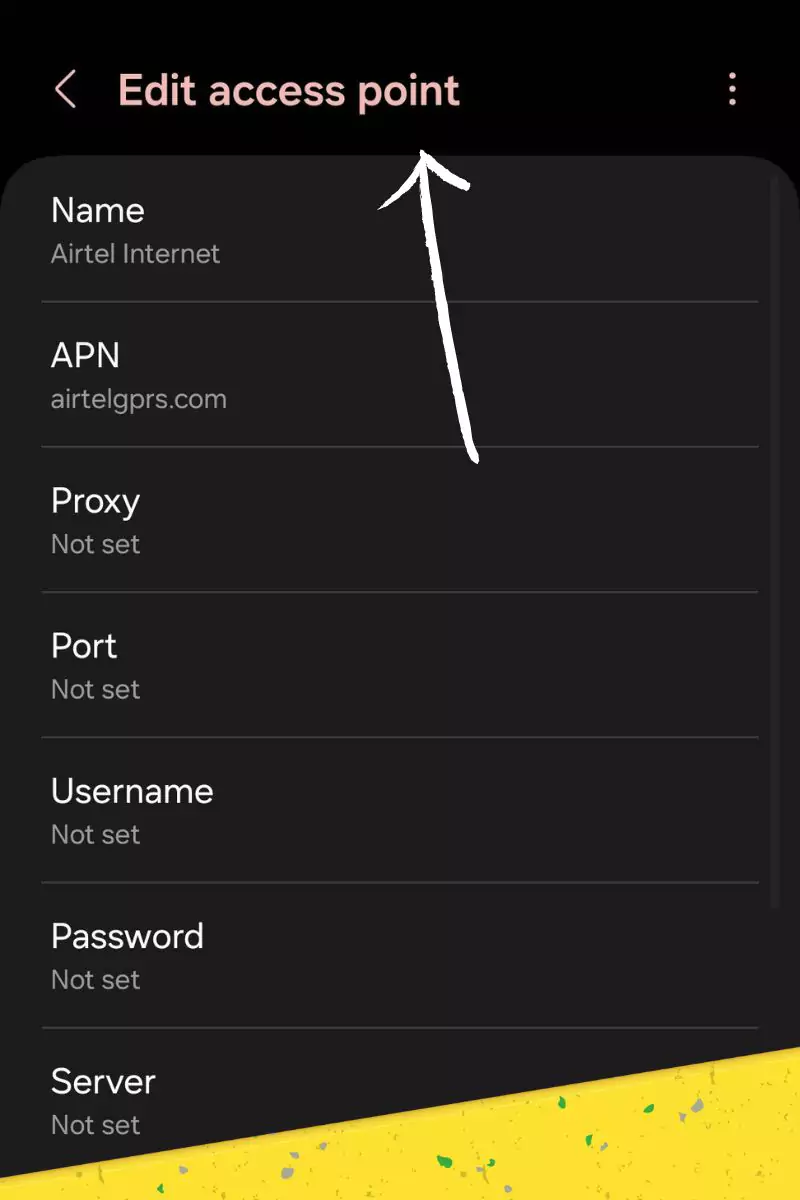
- Input Recommended Values Within the editing interface, you’ll find fields like “APN address,” “Proxy,” and “Authentication.” These settings govern how your device communicates with the O2 network. Be sure to input the recommended values provided by O2, such as an APN address like “mobile.o2.co.uk”.
Restoring O2’s Default APN Configuration
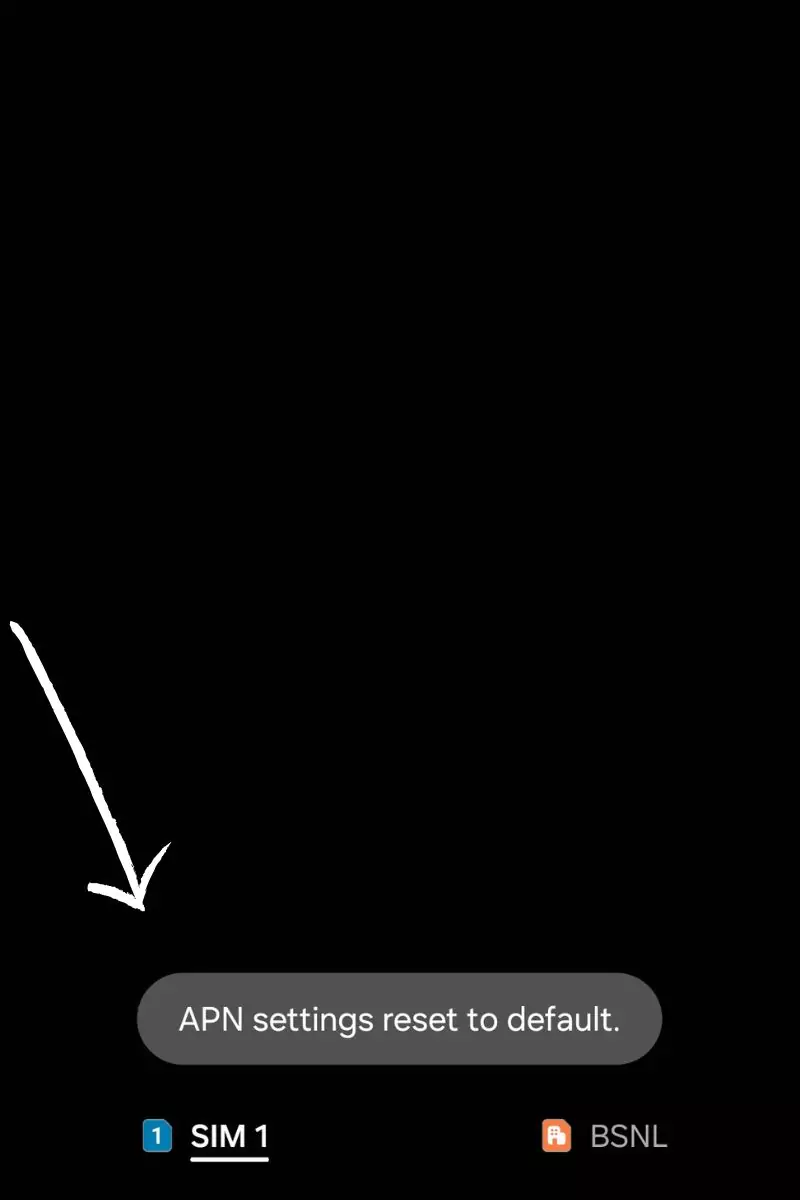
However, if you’ve made modifications that seem to have caused connectivity issues, fear not! You can revert to the original, O2-specified APN settings with these simple steps:
Sometimes, custom APN tweaks may cause conflicts or connectivity issues. In such cases, resetting to the default settings can resolve the problem:
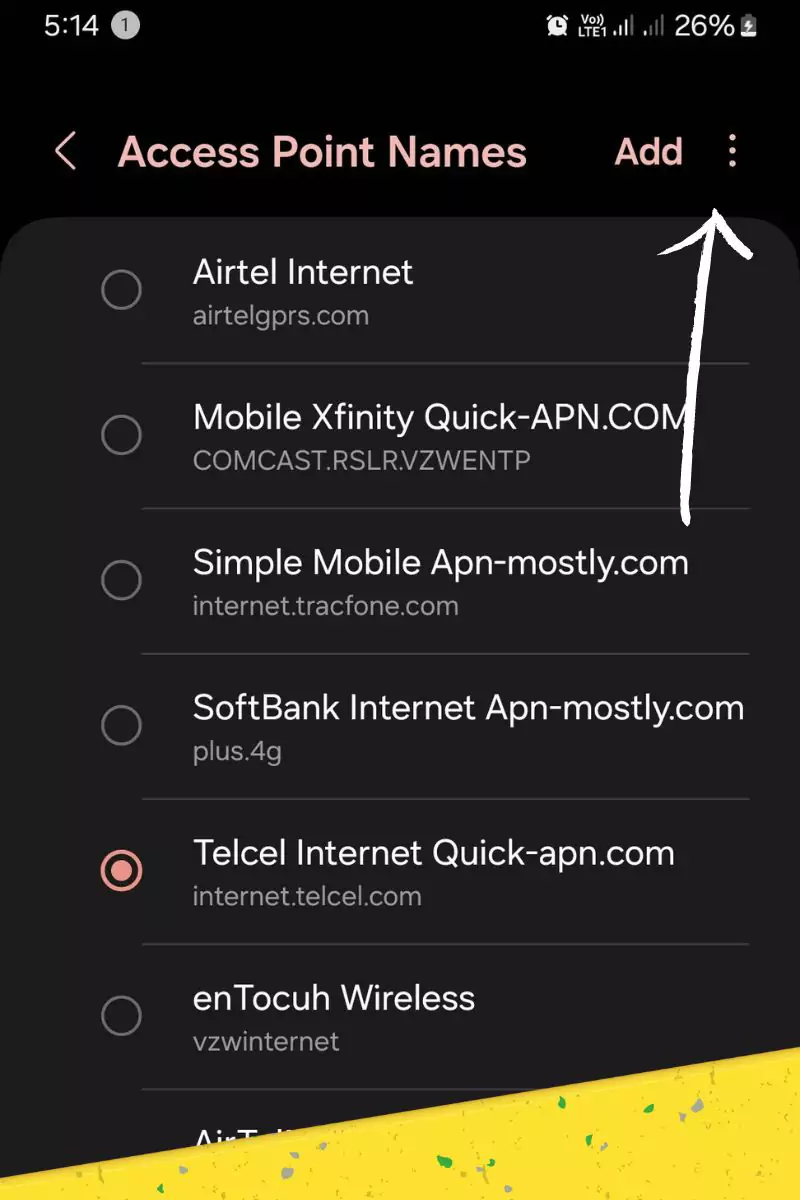

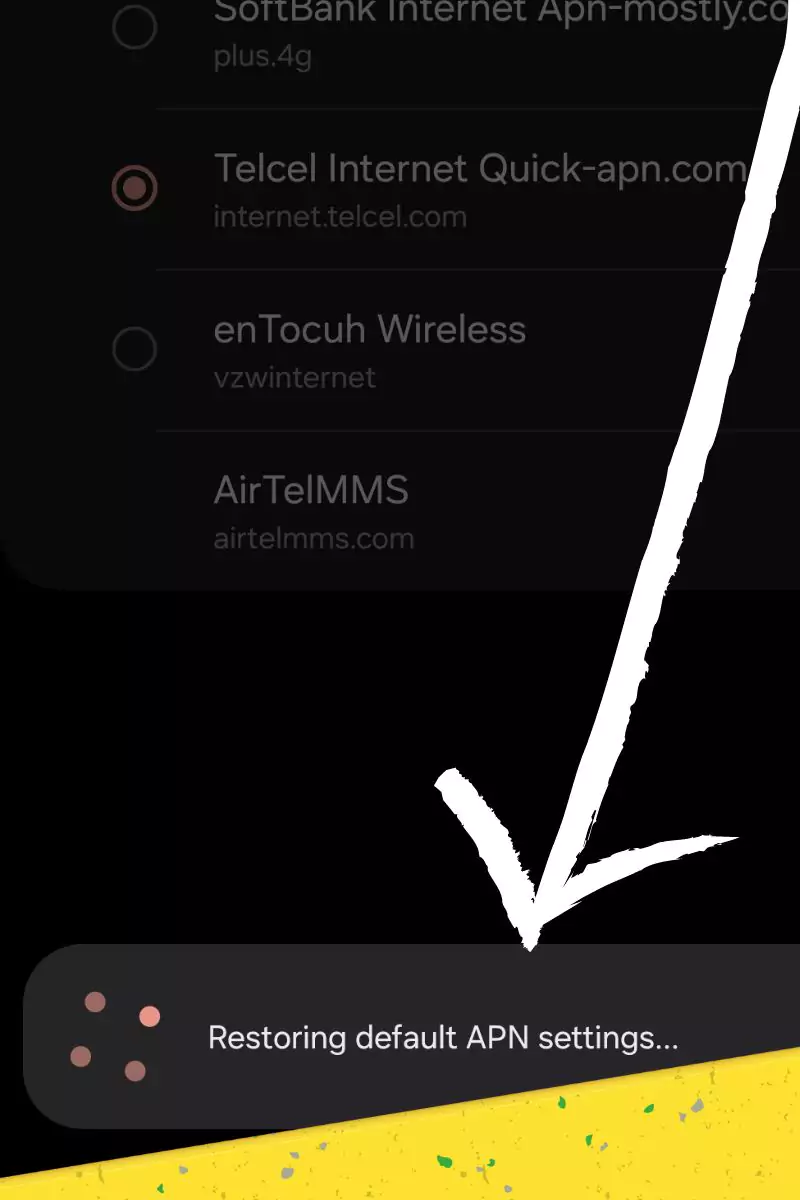
- Return to APN Management Navigate back to the “Access Point Names” or “APN” section within your network settings.
- Identify Reset Option For the O2 APN entry, look for an option labeled “Reset to default,” “Restore original settings,” or represented by icons like a refresh or undo symbol.
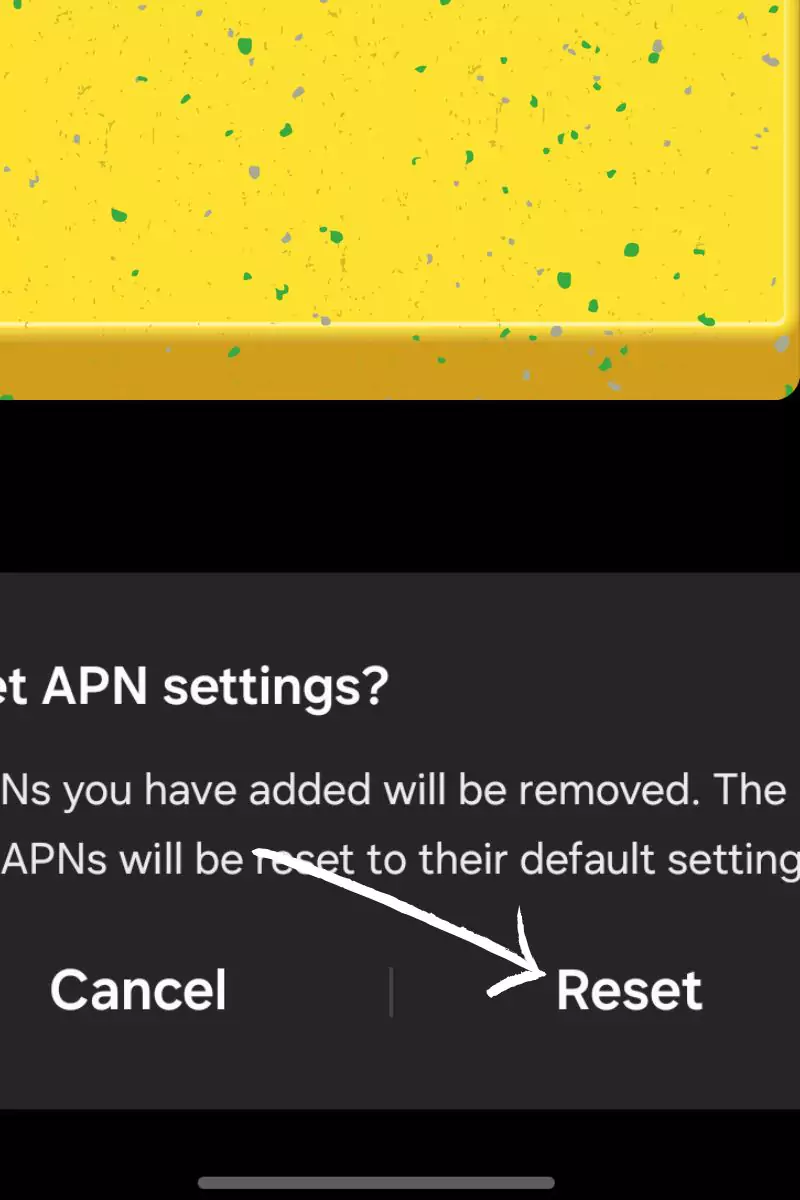
- Initiate Reset Process Once you’ve located the reset function, select it to begin the process of restoring the default O2 APN configuration.
- Confirm Reset Action You may need to provide confirmation to proceed with reverting all APN details for O2 back to the carrier-specified defaults.
Here are the steps to configure O2 APN settings on your iPhone:
- Go to Settings and select Cellular.
- Tap Cellular Data Network.
- Enter the APN settings provided by O2 in the relevant fields.
- Save your changes and exit the settings menu.
Congratulations, you’ve successfully configured your O2 APN settings on your iPhone! However, if you still experience issues connecting to the internet, don’t panic. You can troubleshoot common issues with APN settings on your iPhone.
For instance, try resetting your network settings if you’re experiencing slow internet speeds. This will clear all your network configurations, including APN settings, and restore them to their default values.
Similarly, if you cannot connect to the internet, try toggling the airplane mode on and off, or restart your iPhone.
More O2 Access Point Name For iOS Devices
Remember, having the correct APN settings is essential for a smooth internet connection on your iPhone. It ensures that your device can communicate with the mobile network effectively and transmit data at the desired speed.
On the other hand, incorrect or outdated APN settings can cause connection issues, slow internet speeds, or even result in excess data usage.
In conclusion, configuring O2 APN settings on your iPhone is a simple process that can be done in minutes.
By following the steps outlined in this guide, you’ll be able to enjoy a seamless internet experience on your iPhone, no matter where you are. So try it out, and let us know how it worked for you!
waste if you don’t have this o2 apn